Getting started goes from installation to the first picture. These chapters are written step by step, naming every button.
Event management covers the heart of RAWCaptureBooth: every party is its own event, with its own settings, layouts and pictures.
Event settings and System and device settings follow the structure of the admin area. They are meant for looking things up, not for reading front to back.
Tools covers the layout editor, the digital background and the web photo album.
Running an event contains the timeline of an event day, storage locations, data protection and troubleshooting.
Touchscreen, portrait or landscape; resolution from 1280 × 800
Additionally required
Microsoft WebView2 Runtime (already present on current Windows installations)
For printing
A printer set up in Windows
For cloud, mail and web photo album
An internet connection, at least occasionally
Without an internet connection the booth keeps working: capture, layout, print and gallery need no network. Only sending, cloud upload and the licence check catch up later.
As of version 3.3.0 RAWCaptureBooth is released as a 64-bit edition only. Anyone who used the 32-bit edition so far simply installs the 64-bit one: events, layouts, captures, settings and the licence live outside the program folder and remain available unchanged. The licence does not need to be activated again.
On 32-bit Windows the previous version 3.2.0 keeps working, but receives no new features.
Run the installer: RAWCaptureBooth_..._x64_Setup.exe.
Choose the language, then accept the licence terms and the privacy notice. The language chosen here also sets the language of the application; it can be changed later in the admin area.
Confirm the target folder. The default is the Windows program folder.
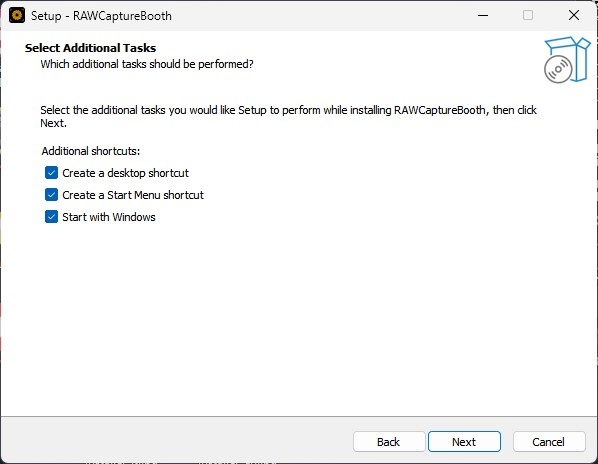
Choose the additional tasks:
Desktop icon and Start menu entry — preselected on a first installation.
Start with Windows — useful for kiosk operation, so the booth comes back on its own after a power cut. Can be changed later under "System Settings" > "System".
Finish the installation and start the application.
The three checkboxes decide about the desktop icon, the Start menu entry and starting together with Windows.
The program itself sits in the program folder, while everything that changes lives in the profile of the signed-in user:
%LOCALAPPDATA%\RAWCaptureBooth\
├── config\      device settings
├── events\      per event: settings, layouts, graphics, pictures
├── storage\     working files of the current session
├── logs\        logs for troubleshooting
└── backups\     backups
Uninstalling leaves this folder in place, so pictures and settings survive a reinstall.
An update is installed with the same installer; no uninstall is needed. Settings, events and pictures are kept. The software reports new versions itself and shows the list of changes.
On the first launch an assistant sits on top of the start screen. It has five steps and takes less than two minutes.
Choose the language — the language of the booth. It can be changed at any time; which languages guests are offered is set separately, per event.
Build type — photo booth or photo mirror. For the photo mirror, the camera is rotated by 90° and the live view mirrored right away; more under Photo mirror.
Admin access — the assistant shows where the admin area is: behind a hidden area at the bottom left of the screen, marked by a blinking dot. The factory PIN is 0000.
What happens next — a pointer that the real setup happens in the admin area.
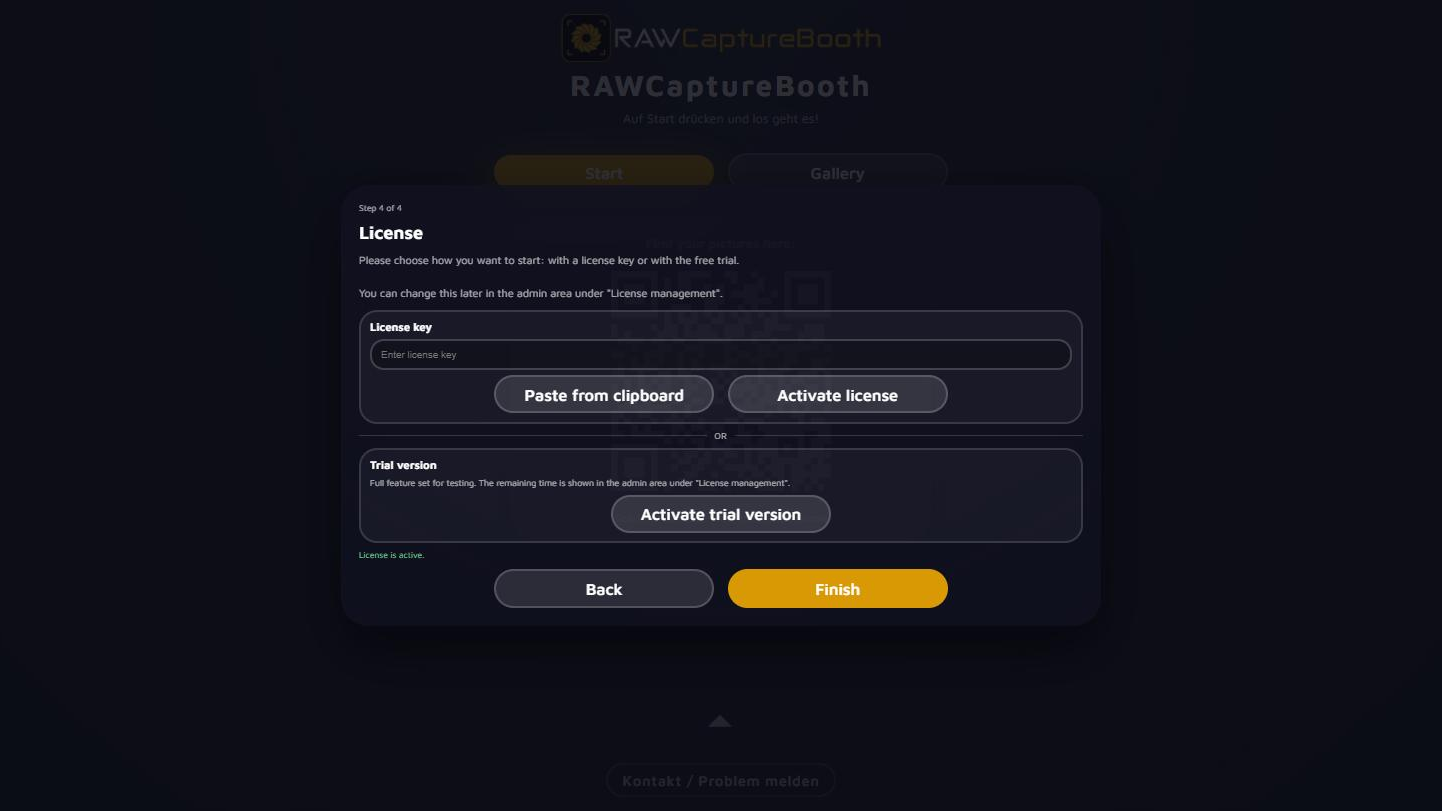
Licence — either a licence key or the free trial with the full feature set. Without an active licence or trial no capture can be started. Both can be sorted out later under "System Settings" > "License management".
The last step of the assistant: either enter a licence key or activate the trial version.
"Finish" closes the assistant; it does not come back.
The blinking dot stays in the bottom left afterwards, together with a speech bubble naming the way into the admin area and the factory PIN. Both disappear once the admin area has been open for the first time.
The first time the admin area opens, it offers a short tour: menu, search, favourites, automatic saving and event management. It can be ended at any time and started again later.
It is worth taking, mostly because of the menu structure. The menu is split into three blocks, and the difference decides where a setting lives:
Block
Colour
Contents
Event management
Accent colour
Creating, loading and backing up events; presets; customer configuration
Event settings
Green
Everything belonging to the individual party, travelling with an event switch
System and device settings
Purple
Everything attached to this booth: camera, printer, accounts, licence
Above them sits "Favorites": the star in the header of each area puts it there — handy for the handful of areas touched before every party.
Directly below sits "News" with posts about RAWCaptureBooth. A pulsing dot there shows that something has been added since the last visit.
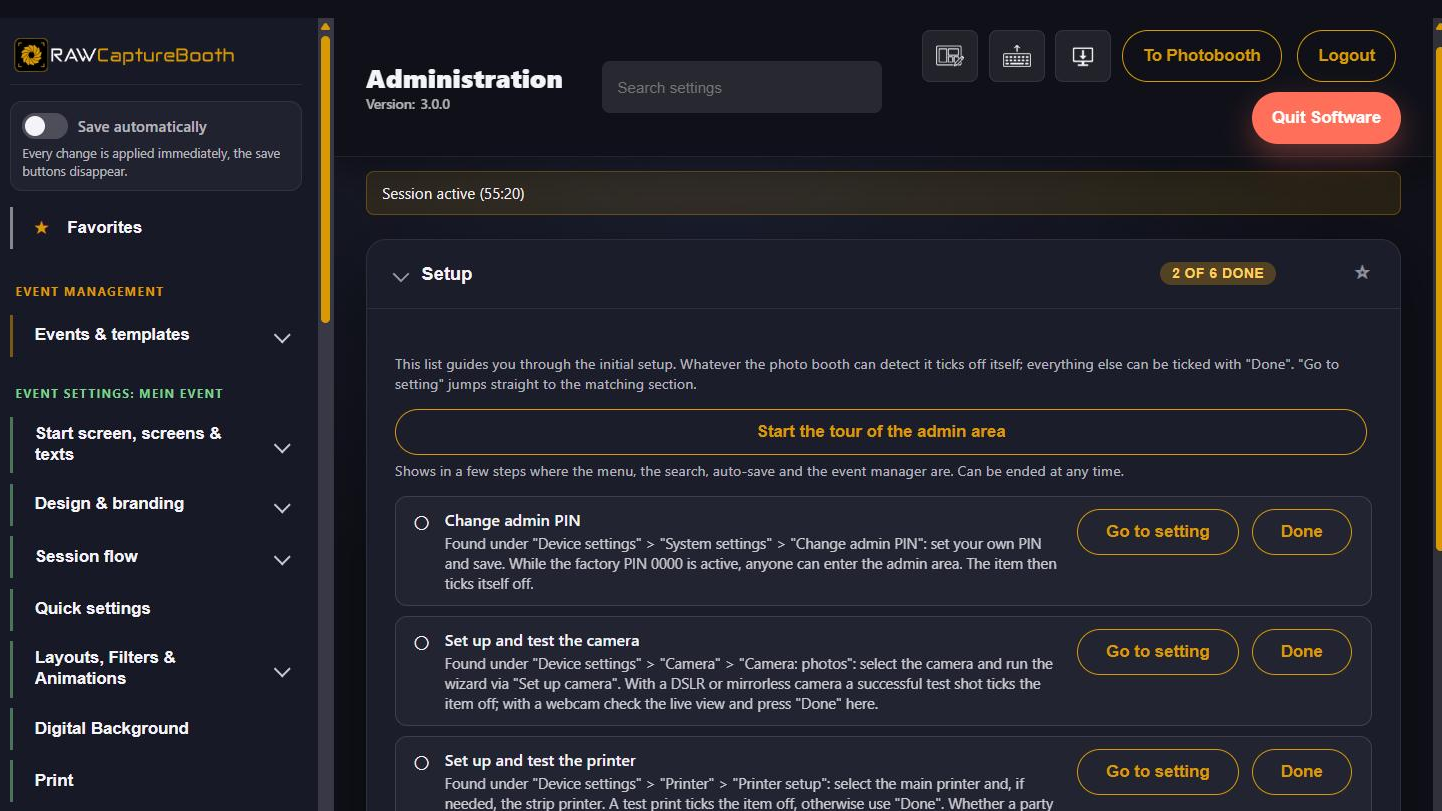
"System Settings" > "Setup" walks through everything that has to be done once per device. The order follows the way through the setup: first make the device operational, then connect the hardware, then decide the routes the pictures take to the guest — and last the first party. What the booth can detect it ticks off itself; everything else is ticked with "Done". "Go to setting" jumps straight to the matching area.
The setup list: the badge in the top right counts how many of the eight items are done.
The eight items:
Activate licence — without an active licence or trial no capture can be started. While the trial runs, the item counts as done and points out that a key can be added at any time.
Change admin PIN — ticks itself once saved.
Prepare Windows for photobooth operation — switch off edge swipe gestures and make sure in the power options that neither the screen nor USB devices are turned off. The easiest way is the free "FST" tool from the download area of the website; it converts Windows in one go. Then press "Done".
Set up and test the camera — on DSLR and mirrorless cameras a successful test shot ticks the item. See Setting up the camera.
Set up and test the printer — a test print ticks the item. If printing is switched off entirely, the item disappears. See Setting up the printer.
Add an email account — server, login and sender address of the outgoing mail under "Access & accounts" > "Mail access (SMTP)". As soon as server and sender are set, the item ticks itself. The access applies to all events; whether a party sends pictures by email is set with the event. See Cloud and e-mail.
Set up a cloud service — sign in to a Dropbox, Google Drive, pCloud or Nextcloud account or enter the address of your own server, under "Access & accounts" > "Cloud account". The account applies to all events too; which service a party uses is set with the event. See Cloud and e-mail.
Camera, printer and the accounts for mail and cloud belong to the device and are now done. Everything else — layouts, start screen, print permission, gallery, QR codes — belongs to the individual party and is set up in the event.
Setting up the camera
Found under admin area "System and device settings" > "Camera". The camera belongs to the device: it stays set up no matter which event is loaded.
There are two separate areas — "Camera: photos" and "Camera: boomerang". Both can use the same camera or different ones, for instance a DSLR for photos and a webcam for the boomerang. GIFs are photo series and are taken with the photo camera. The button "Copy from photo camera" saves setting everything twice.
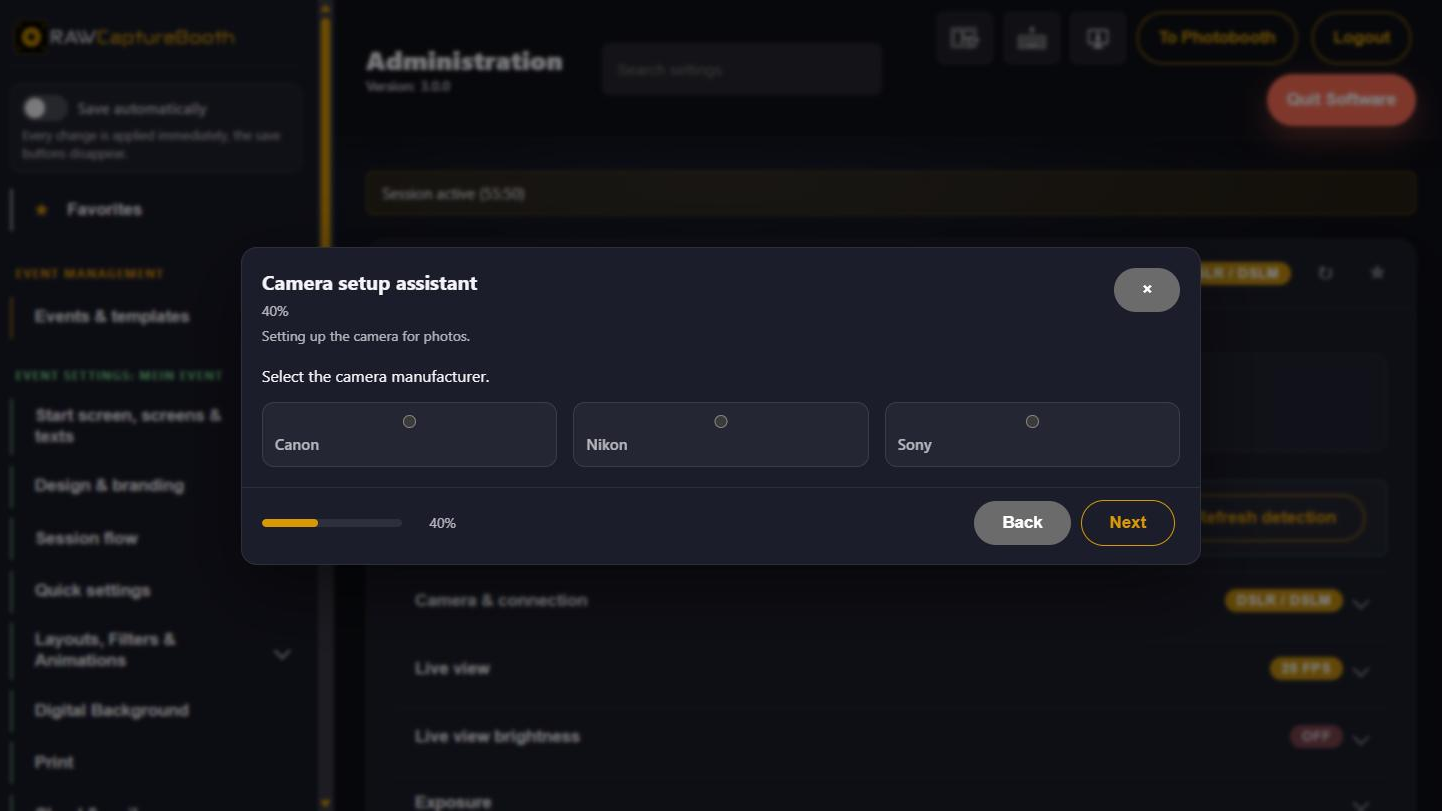
Setup runs through the button "Set up camera". The assistant asks for manufacturer and connection, checks the link with a test shot and then asks when the camera should focus and which exposure suits the setup. The waiting times only appear when the test shot does not get through. Nothing is stored until you finish with "Apply & save".
Connect the camera by USB, switch it on and set it to M (manual).
Insert a memory card — even with direct transfer to the PC, some models insist on a card.
Open "Camera: photos" in the admin area, start "Set up camera" and follow the steps.
Finish with "Apply & save".
After the question webcam or DSLR/DSLM comes the manufacturer; the progress is shown above the dialogue.
For Canon cameras the assistant enables extra drivers (EDSDK) and asks for a restart of the application. That is normal.
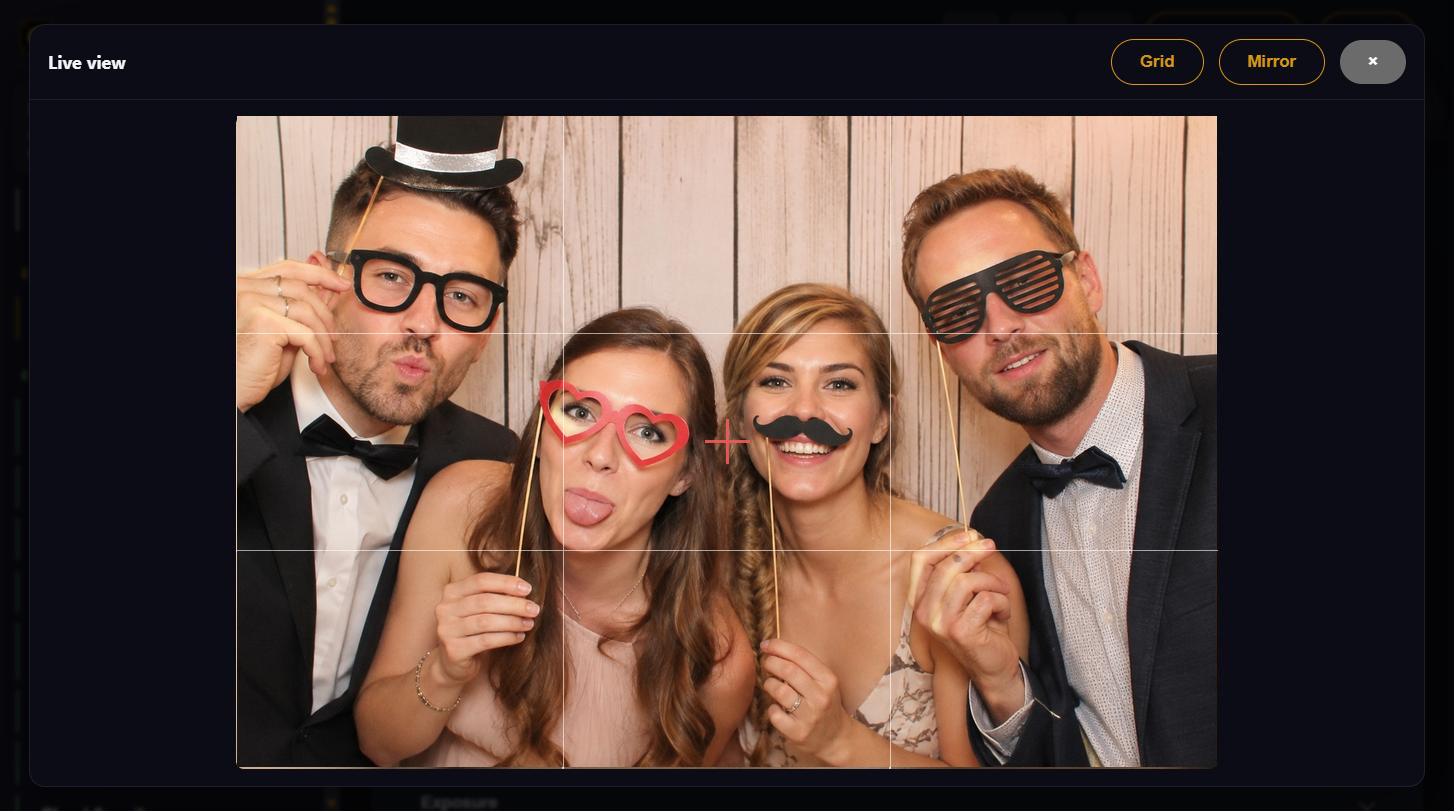
The "Detected camera" section shows what the software currently sees — model and serial number. "Refresh detection" repeats the search, for example after switching the camera on.
With several identical cameras connected, "Select a specific camera" decides which one is meant (by serial number, port or model).
If the camera reports its battery level, it is shown as well. Below 25 percent a note asks for a battery change or a charge; the status mail mentions it too. With a mains adapter attached it says "Mains power" instead of a percentage — and no warning.
If the camera sits on its side - upright on a tripod or upside down under a ceiling mount - its picture comes out sideways. The "Rotate camera image" selection in the "Camera & connection" subsection puts it upright again.
Selection
When it fits
Do not rotate
The camera sits level, as usual
90° clockwise
The top of the camera points to the right
180°
The camera hangs upside down
90° counterclockwise
The top of the camera points to the left
Which of the two 90° options fits shows up in the live view right away: if the picture ends up the other way round, it is the other one.
The rotation applies to the live view and to the finished shot. Layout, gallery, mail, cloud and print all receive the already rotated picture. If mirroring is switched on as well, it applies to the upright picture.
The photo camera and the camera for the boomerang are set separately - two different cameras can be connected there. Once a rotation is set, the angle appears in the badge of the "Camera & connection" section.
Most DSLR and mirrorless cameras have an orientation sensor. They do not rotate the picture themselves, but they record the position in the file - and the photo booth reads that record everywhere. With such a camera the shot is already upright before the setting takes effect; the rotation is then not applied a second time and only affects the live view. If the sensor is missing or switched off in the camera menu, the photo booth rotates the picture itself. Both cases use the same setting - it describes the mounting, not the work.
A note on upside-down mounting: many cameras only report a sideways tilt, not upside down. At 180° the setting therefore usually carries it alone.
RAW files stay exactly as the camera wrote them; they carry the orientation inside the picture itself.
The sub-area "Photo slots in the live image" holds the choice "Show the layout photo slots in the live image". It decides whether guests see how many photos are still to come before the shot. The badge in the header names the chosen representation.
Choice
What happens on screen
Do not show
Only the live image, as without a layout
Whole layout to scale
The complete layout at original size: the live image sits in the current photo slot, finished slots show their photo
Strip along the left edge
The live image stays large, one tile per shot sits along the left edge
Strip along the right edge
The same strip, only on the right
In the strip each tile first carries its number. As soon as the photo is taken, the tile shows it, and the tile of the current photo is highlighted. The strip is semi-transparent and sits on top of the live image. If the layout uses a photo more than once - photo 1 twice, for example - it still appears only once in the strip; the scaled representation shows every photo slot.
Two further fields belong to the strip and only appear with a strip:
"Hide the strip after" in seconds. With 0 it stays in place. Otherwise it withdraws after the set time and returns for every new shot.
"How it disappears" - slide to the side or fade out gently.
The same area holds "Photo slot of the layout in the live preview". It determines what the live image shows of the single photo slot: cropped to the slot, the whole live image with dimmed edges, or no marking at all. With the scaled representation there is no edge that could be dimmed - the setting has no effect there.
Filters and digital backgrounds are not visible in either representation; they only arrive with the finished image processing.
There are two ways to brighten the live view. Each has its own section, and the difference matters:
"Set in software" brightens only the image the software displays. The camera is left alone, it works in every camera mode and never affects the finished photo. On mirrorless cameras this is often the only option.
"Set on the camera" puts the camera on fixed values for the duration of the preview — a shutter speed and an ISO, both configurable in the same section. The original exposure is restored right before the shutter fires, so the flash shot stays correct.
With flash settings such as 1/160 s, f/9 and ISO 400 the live view is almost black; the camera route helps there. Cameras that never show an exposure preview in live view (common on entry-level models) will not react to it — then the software route remains.
The target-value route has a limit: the shutter speed must not get longer than one frame of the configured frame rate, otherwise the preview stutters. With flash settings the live view often stays too dark because of that. The ISO value carries the remainder.
On Canon cameras there is a second, far more effective switch for this: "Switch off the exposure preview on Canon". During the preview the shutter speed is then set to "Bulb". The camera can no longer simulate the exposure and controls the live view itself - the result is a bright, clearly visible image regardless of aperture and ISO.
The switch only works in camera mode M and only on cameras that accept Bulb. Before every capture the shutter speed is restored and confirmed; if that fails, it is tried again next time. It is switched off by default.
Whether a camera accepts the values at all is answered by "Check the effect on the camera". It sets a test value, reads it back and restores it immediately. If the camera accepts it but does not show it in the live view, that is the awkward case: the camera is being changed without anyone seeing it. Common on entry-level Nikon bodies.
The fields for aperture, shutter speed, ISO, exposure compensation and white balance show what the camera is currently set to. Every change goes straight to the camera — there is no save button here. The values are read automatically when the section is opened; "Read values again" fetches them anew if someone has turned a dial on the camera in the meantime.
Nothing is stored here. The camera keeps its settings itself; a value held in the software could go stale without anyone noticing - and whoever sees it then takes it for the camera's state.
What the mode dial allows. The camera detection and the header of this section name the mode the camera's dial is set to. Whatever the camera chooses itself in that mode is greyed out; the reason is shown underneath.
Mode
Adjustable
Chosen by the camera
M
Aperture, shutter speed, ISO, white balance
– (exposure compensation has no effect here)
Av / A
Aperture, ISO, exposure compensation, white balance
Shutter speed
Tv / S
Shutter speed, ISO, exposure compensation, white balance
Aperture
P
ISO, exposure compensation, white balance
Aperture, shutter speed
Full auto, scene modes
–
All values
With flash, M is the usual choice. With continuous light of changing brightness, Av/A with exposure compensation is often the calmer choice: the camera evens out the brightness, the compensation only shifts the overall tone.
Before every preview the booth remembers what is set on the camera and restores exactly that afterwards. If restoring fails once, the remembered value is kept and used again next time — so the exposure cannot creep upwards over the course of a long party.
If you do not know which values suit your setup, describe it: light source, ambient light, distance to the guests, number of people, movement in the frame and whether low noise or brightness matters more. The booth suggests aperture, shutter speed and ISO, explains the choice, names what to watch out for and how to fine-tune after the test shot. The button writes the suggestion into the fields above.
"Shortly before the shot": The photo booth triggers the autofocus itself and only releases the shutter once focus is confirmed. The more robust choice in low light. On Canon with a persistent connection this already happens towards the end of the countdown. If a camera focuses too slowly in live view (older Canon SLR cameras such as the EOS 1100D), the photo booth switches the setting to "At the moment of the shot" by itself.
"At the moment of the shot": Focusing is left to the camera. Fastest, but more prone to blurred images in the dark. The factory setting.
"Manual focus": No autofocus command. For setups with a fixed focus distance; the lens is then set to manual focus as well.
"Trigger autofocus before starting live view" — not every camera can do this, and some cannot focus at all while live view is running.
"Repeat autofocus" — 0 by default, so the camera focuses once at the start of the live view. A value from 2 seconds upwards makes it refocus again and again while the live view runs; helpful when guests stand at different distances, but it loads the connection to the camera. Some cameras cannot cope with it and then stop delivering a live view at all.
Digital SLRs offer two colour spaces in their menu: sRGB and Adobe RGB. The factory setting is sRGB, and that is where it should stay for the photo booth — sRGB is the colour space screens, web galleries and photo printers work in.
If the camera is set to Adobe RGB, RAWCaptureBooth detects this from the information in the image and converts the shot before further processing. Print and gallery then show the right colours. Saturated colours that do not exist in sRGB are lost in the process, however, and every shot costs a good quarter of a second more. Switching the camera to sRGB is therefore the better route.
The untouched camera file is kept either way and goes into the raw image upload as it is.
Camera off, asleep or claimed by another program. Switch it on, close other programs, "Refresh detection"
Live view stays black
Lens cap, camera in an automatic mode with flash settings, or live view disabled on the camera
Shutter fires, no picture
The autofocus finds nothing. More light on the subject, choose "Shortly before the shot" or switch to manual focus
Camera falls asleep mid-event
Disable the camera's auto power-off and check the Windows power options (see setup list, "Windows")
Capture aborts with a timeout
Raise the values under "Time limits". Only touch them if captures actually fail
Live view does not start at all
The message names the reason the camera gives — no memory card, weak battery, mirror lock-up, lens without CPU contacts, aperture ring not at the smallest aperture
Camera stops responding entirely
On Canon the camera system can hang. After twenty seconds the software says so and asks for a restart — there is no other way out
Setting up the printer
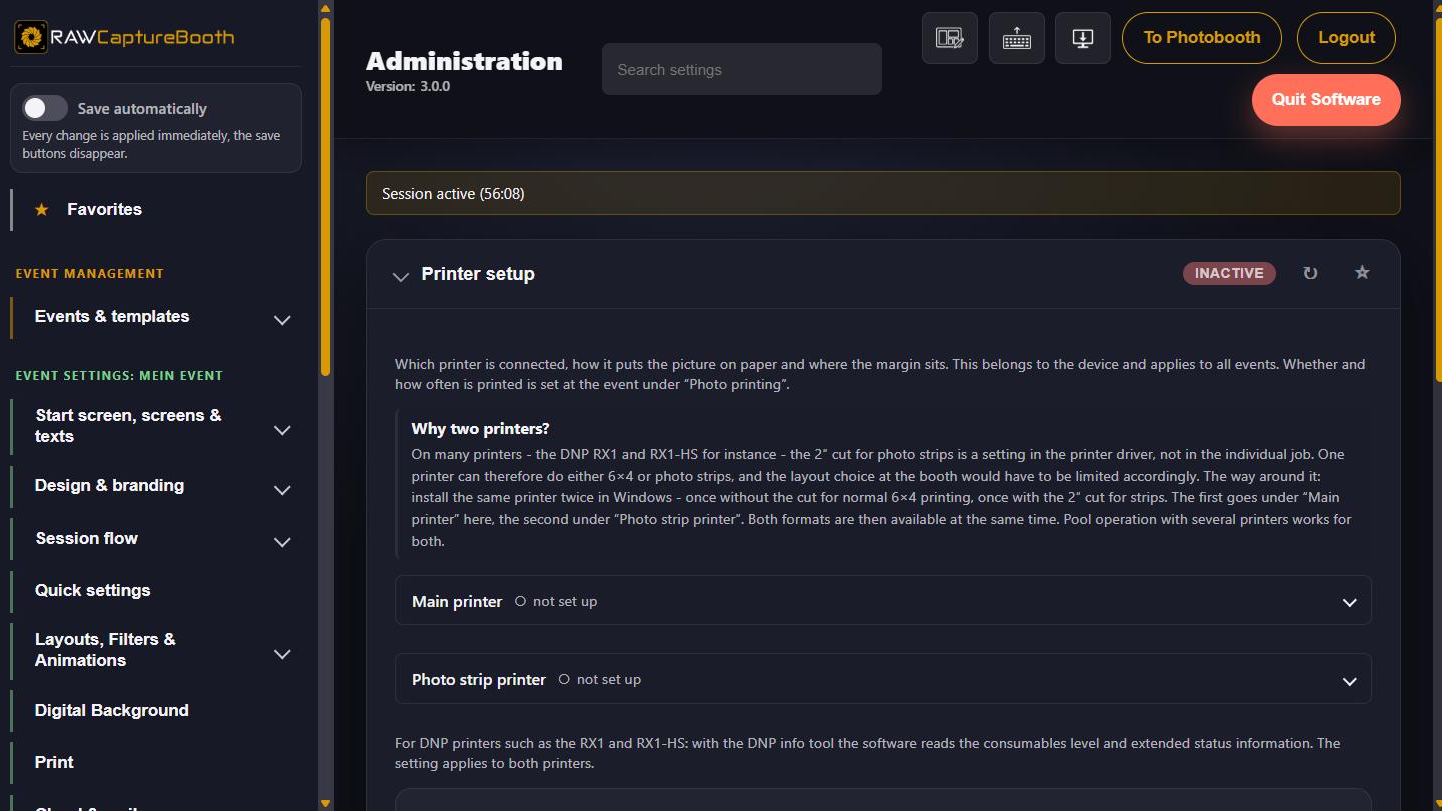
Found under admin area "System and device settings" > "Printer" > "Printer setup".
Printing is split across two areas on purpose:
Which device prints and how the picture reaches the paper — here, with the device. Applies to all events.
Whether and how often anything is printed — with the event, under "Print". No printing at the company party, two copies at the wedding: same booth, same paper, different party.
The printer has to be installed in Windows with the correct paper size in the driver (usually 6″ × 4″). Whatever is set there is what the software uses.
The section "Photo strip cut" sits inside "Photo strip printer". The cut is set up there once per device; after that RAWCaptureBooth applies it to every photo strip job itself. The same printer is then the "Main printer" above and the "Photo strip printer" below, and both formats run at the same time.
Setting it up:
Click "Set up". For known devices the assistant names the setting you are looking for — on the DNP RX1 and RX1-HS, for instance, "2inch cut" with the value "Enable".
"Open driver dialog". The familiar printer driver window appears. Set the named option there and confirm with OK.
Optionally print a test sheet: two panels with a cut line between them. It shows at a glance whether the sheet was cut, whether in the right place, and whether the margin is right. To skip it, choose "Keep without test print".
"Yes, keep this" stores the setting permanently.
> The printer driver dialog appears on the booth computer. This step therefore cannot be done via > remote access; the assistant says so.
In a printer pool every device is set up separately — the cut is a setting of that printer's driver. A list shows for each printer whether it is already set up. If one device is missing it, photo strips come out uncut as soon as distribution falls back to it.
If the driver changes — after an update, for example — the stored setting no longer matches. It is then not used and marked "no longer matches the driver" in the list; setting it up once more is enough.
First queue without the cut — goes under "Main printer" in the software.
Second queue with the 2″ cut — goes under "Photo strip printer".
This route keeps working unchanged. If your printers are already set up this way, nothing needs to change. Pool operation with several devices is possible here too.
Hardly any printer hits the paper exactly. There are two levels for that:
Per-printer correction ("Correction top/bottom/left/right") — compensates for the quirks of the device. It belongs to the printer and stays the same across all events. "Test print on this printer" checks the result, "Reset correction" starts over.
Offsets with the event — move the artwork inside the printable area, for example when a layout is meant to have a wider white margin.
For DNP printers such as the RX1 and RX1-HS the software uses the DNP info tool to read the consumables level and extended status information — in other words, how many prints the loaded media still has. The tool's folder is entered under "DNP info tool"; the setting applies to both printers.
Some Citizen photo printers are identical in construction to DNP models and respond to the same queries. The Citizen CY-02 is confirmed, further models are possible but untested. They are set up exactly like a DNP printer.
Printer offline or paused in Windows. Check the Windows queue
Picture is skewed or cropped
Wrong paper size in the driver, or the per-printer correction is missing
Strips print as 6 × 4
The queue without the 2″ cut was entered for strips
Printing stalls, jobs pile up
Paper or ribbon empty; the queue continues after reloading
Guests print too much
With the event under "Print", limit the maximum for guests or turn off the copy selection
Your first event
Camera and printer are ready and the licence is active. What is missing is the party. This chapter creates a complete event, using the running example "Smith wedding".
An event is a party with everything that defines it: its own layouts, its own graphics, its own start screen, its own print and sharing rules and its own pictures. Exactly one event is loaded at a time. Camera, printer, accounts and licence are untouched by it — they belong to the booth.
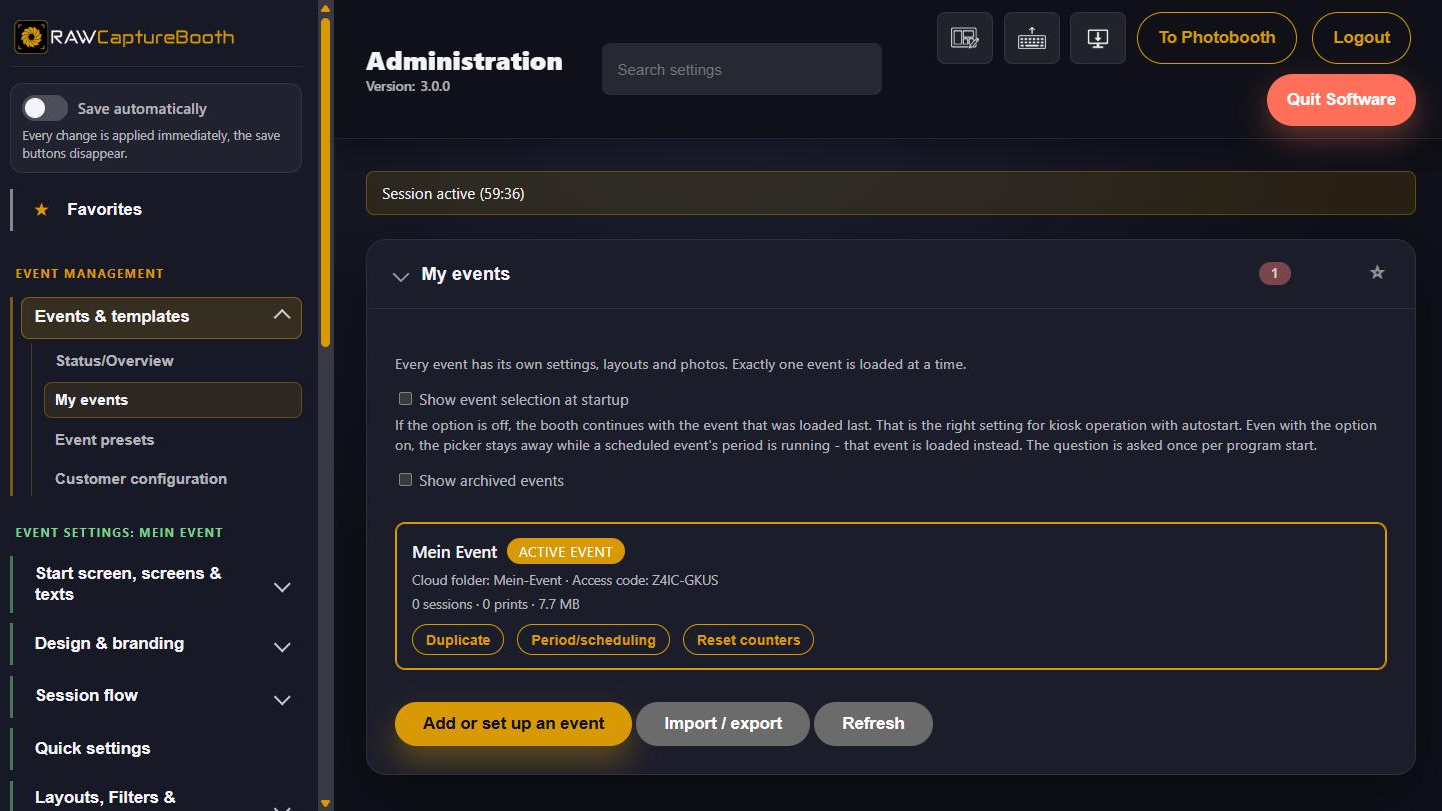
Open the admin area, go to "Event management" > "My events".
Press "Add or reconfigure event". The event assistant opens.
At the bottom left, "Add or set up an event" starts the event assistant.
The assistant walks through up to 14 steps. For a first event it is enough to leave the defaults alone and set the three or four entries that really matter.
For the very first event: Start empty. Presets exist only once a set-up event has been stored as a template; the supplied layouts are there from the setup onwards.
Name, date and note. The name matters most — the cloud folder and the link to the web photo album are derived from it. The assistant shows both while you type, and only where they are actually used.
For the example: name "Smith wedding", the date of the party, note along the lines of "contact: best man John, teardown from 2 am".
Decides whether the booth loads this event by itself when the time comes. Start and end with times, across midnight as well — a party from 3 pm to 2 am is recognised right to the end. For a new event the period is switched off — the checkbox turns it on, and the fields then hold a start of now and an end a week later.
This is the setting that makes a restart in the middle of the party harmless: the booth comes back up and loads exactly the party that is running.
"My events" lists every event with name, period, note, counters and disk usage; the loaded one is highlighted. "Load" switches to it. Layouts, graphics, access code and limits are exchanged — camera and printer stay as they are.
How events work
Every party is its own event. It brings its own settings, layouts, graphics and pictures. Exactly one event is loaded at a time; its name appears in the heading of the admin area, so it is always clear what is being edited.
Loading exchanges the event-bound settings, layouts and graphics, and the gallery shows the pictures of the new event from then on. Camera and printer stay connected.
Pictures are never lost: they live in their event's folder and reappear as soon as it is loaded again.
An event can start empty or descend from something existing:
Preset — a template of layouts, fonts, graphics and event-bound settings. A preset never contains camera, printer, cloud account or licence, so it never reconfigures the hardware. The supplied "Standard" preset is always available.
Copy of an event — takes everything from an already configured party, without its pictures.
%LOCALAPPDATA%\RAWCaptureBooth\events\<event>\
├── config\      settings of this event
├── layouts\     layouts
├── fonts\       fonts
├── branding\    logos and graphics
├── sessions\    pictures per session
└── gallery\     gallery with thumbnails
The storage location for all events can be changed in the device settings — useful when many parties are kept and the system drive is small.
Managing events
Found under admin area "Event management" > "My events". Every event is listed with name, period or date, note, counters and disk usage; the loaded event is highlighted.
The loaded event is highlighted and carries the "Active event" badge; its actions sit in the "Actions" menu at the top right of the card.
All actions sit behind the "Actions" button at the top right of the event card. Tapping it opens the list, tapping elsewhere or pressing Escape closes it again.
Button
Effect
Load
Makes the event the active one. Layouts, graphics, access code and limits travel with it
Edit event
Opens the event assistant with this event. If it is not loaded, it is loaded first - the assistant then opens by itself
Duplicate
Creates a copy without pictures. The quick settings PIN is copied along
Planning
Set start and end, see below
Counter reset
Sets sessions, pictures, animations and prints to zero. The pictures themselves stay
Export photos
Writes this event's pictures into a target folder. The event does not have to be loaded for that
Archive
Removes the event from the selection while keeping it complete. "Show archived events" brings it back into the list
Delete
Removes the event. You are asked whether the pictures should go too
Open folder
Shows this event's folder in Windows Explorer. Only on the photo booth computer
The name can be changed in the list: the pencil behind it turns it into an input field, Enter saves, Escape cancels. The same symbol sits in the line below behind the cloud folder or the identifier and behind the access code; behind the period it opens the planning. Only the value the pencil belongs to is changed.
A note per event holds what would otherwise end up on a scrap of paper — contact person, teardown time, special arrangements. It is only visible internally.
At the bottom of the section the storage location of the events and pictures is shown, next to it two buttons: "Open folder" shows it in Windows Explorer, "Copy path" puts it on the clipboard. For every event a separate button leads straight into its folder.
The folder holds the working data of the software and is not a place to tidy up: renamed, moved or deleted files can cause malfunctions. To get pictures out — onto a USB stick, for example — use the "Export photos" button on the card of the event or admin area "Data Processing" > "Export event photos". Both open the same export.
A link below the notice explains why the folders are nested per event and per session — the arrangement differs from what Sparkbooth, dslrBooth or LumaBooth create.
The "Photos of deleted events" section lists what deleted events left behind on the hard disk: name, date, deletion time, number of files and disk usage per folder. One button per entry leads into the folder, a second removes it permanently; "Clean up all" sits at the top of the section.
It is needed twice: shortly after deleting, when the displayed path was not written down — and weeks later, when disk space runs short and nobody remembers which folders are still occupied.
Start and end with times, across midnight as well. If the party ends after midnight, simply enter the following day's date as the end.
Without an end, the period runs to the end of the starting day.
Without a period nothing changes: the event is loaded by hand.
What follows from that:
At startup the event is loaded automatically if its period is currently running — even after a restart in the middle of the party.
While running, the admin area suggests loading the matching event when you sign in. The switch only happens after confirmation, because it exchanges layouts, graphics, access code and limits.
If two periods overlap, the one that started most recently is suggested; both events are kept.
The head of the list states which event will be loaded next by itself.
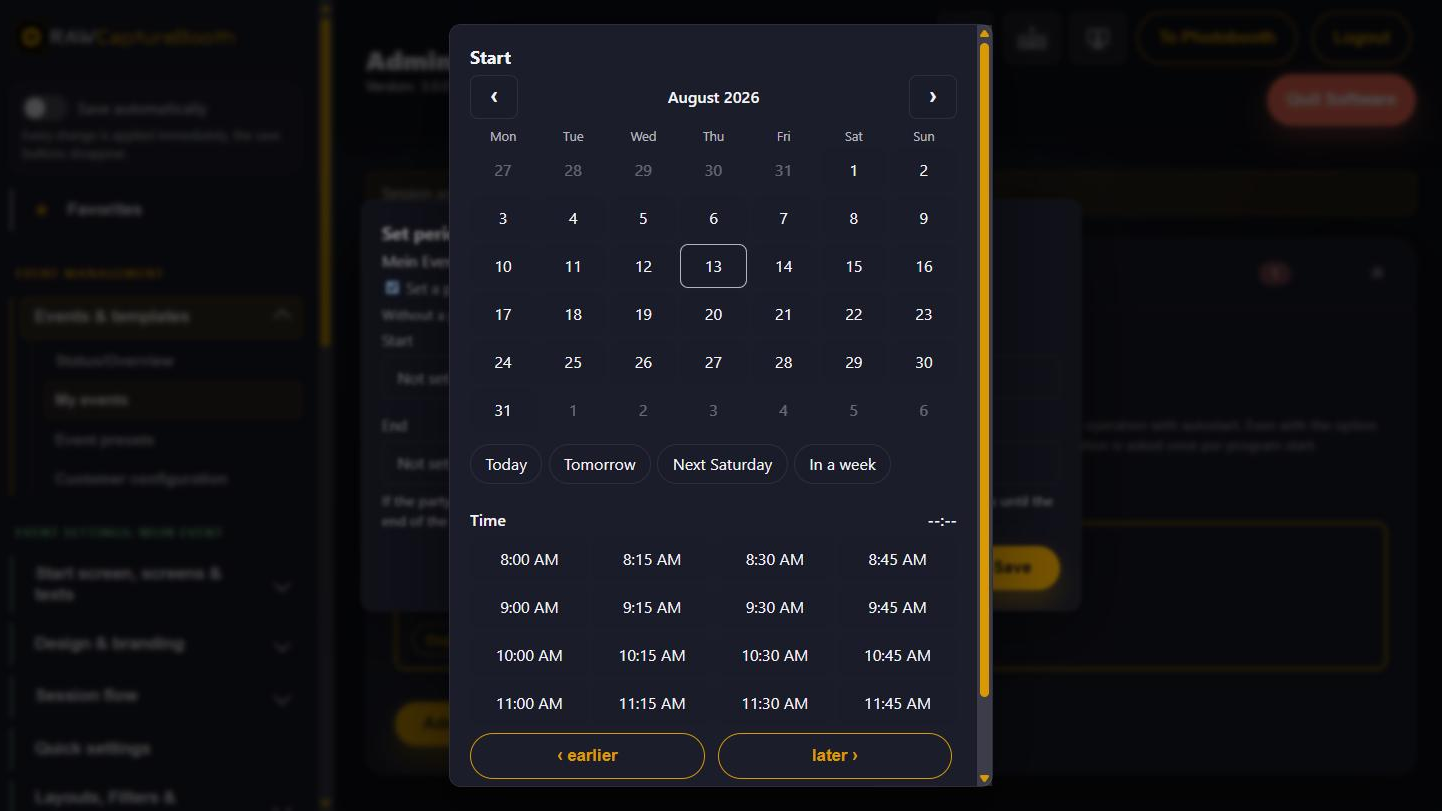
Date and time are set on a screen of their own: a month calendar with large day tiles, times in quarter-hour steps, plus "Today", "Tomorrow", "Next Saturday" and "In a week".
Month calendar, quick choices and time in quarter-hour steps - the same screen is used by the event assistant and the operating hours.
The switch "Show event picker at startup" makes the booth ask which event to load when the program starts. The picker appears instead of the start screen and waits without a timeout; "Continue without switching" keeps the last loaded event. The question is asked once per program start.
With the option off, the last loaded event simply continues — the right setting for kiosk operation with autostart. If a scheduled event's period is running, the picker is skipped anyway and that event is loaded.
Below the event list, "Import, export & handover" leads to event packages. A package contains the settings, layouts, digital backgrounds and graphics of a party — and, if you want, its pictures.
On export you choose whether the pictures come along; the checkbox states in advance how much extra space they need. Archived events can be backed up as well.
The package also contains the access code and the quick settings PIN — so that a backup after a device failure is complete and QR codes already handed out still work.
On import a new event is always created; an existing one is never overwritten. The access code from the package is kept so that QR codes handed out keep working. If it is already in use on this booth, a new one is generated automatically.
After the import the event exists but is not loaded yet — tap "Load" in the list for that.
Customer configuration
Instead of collecting wishes over the phone and typing them in by hand, the customer fills in a form. The file that comes back is read in — and the booth is set up the way they wanted.
The process has three parts:
Assemble the form and send it to the customer.
The customer fills it in and returns the export file.
Read the file in — either while creating an event or into the current configuration.
Found under admin area "Event management" > "Customer configuration" > "Create customer form".
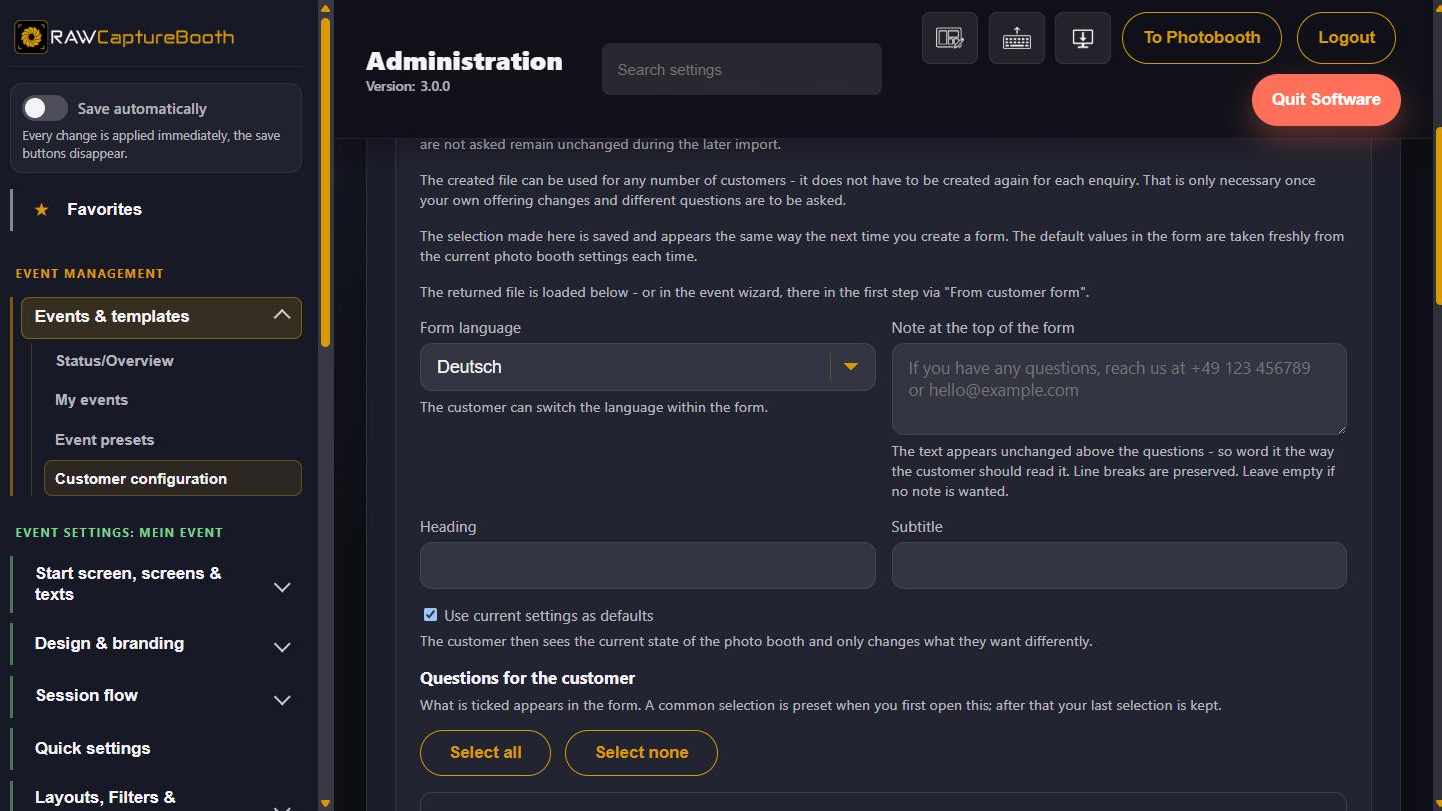
Tick the questions the customer should answer. On first use a common selection is prefilled; after that the last selection is kept.
Set the headline, the subtitle and a note at the top of the form. The note appears unchanged above the questions — so word it the way the customer should read it.
Choose the language of the form. The customer can change it inside the form; all six application languages are available.
Optionally tick "Use current settings as defaults" — the customer then sees the current state of the booth and only changes what they want differently.
Press "Create form" and pick a location to save it.
Form language, headline and note sit above the list of questions; what is ticked appears in the form.
The result is a single HTML file. It can be sent by e-mail and works at the customer's end without an internet connection — a double-click is enough.
Among other things the form also asks whether the booth should be operated by touchscreen, by buzzer or both.
The customer returns the export file. There are two ways on from there:
As a new event — in the event assistant, first step, "Content" > "From customer form". Name, note and all wishes come from the file, so the following steps are already filled in. Below it you choose where the remaining settings and the layouts come from: a preset, a copy of an event, or nothing at all. A name or note you typed yourself is not overwritten.
Into the current configuration — under "Customer configuration", select the file, press "Check preview" and read the report. It shows the entries from the form, the planned changes and any warnings. Only "Apply configuration" commits them; a preset is created as a backup beforehand.
The form asks about wishes, not about technology: no credentials, no camera settings, no printer selection. It is meant to replace a conversation, not to remote-control the booth.
Event presets
A preset is the template of a whole party. It stores the complete state of an event: all settings including cloud, mail and print, plus layouts, fonts, graphics, custom AI styles, green screen backgrounds and custom notice pages — but no pictures and no counters. An event created from a preset therefore looks exactly like a copy of an existing event.
Set up one event exactly the way it will be needed again — layouts, colours, print rules, sharing.
Save that state here as a preset and give it a telling name: "Wedding classic", "Company party without cloud", "Trade fair with pay-per-use".
When creating the next event, choose that preset as the basis in the assistant.
There is no supplied preset. As long as none has been stored, a new event starts empty: it gets the supplied fonts, the supplied layouts are in the first event from the setup onwards, and the first layout of your own is created in the "Layouts" step.
Presets can be exported as a package and imported again — handy for putting the same state on a second booth or for keeping a backup. The package contains everything the preset is made of: settings, layouts, fonts and graphics. The identifiers of the template stay out, so an imported preset never points at the cloud album of someone else's party.
Appearance
The appearance applies to the whole guest interface: start screen, selection screens, gallery, overlays and buttons. It belongs to the event, so every party can look different.
As above, applies to the gallery only — on a tablet as well
Final screen background image
As above, applies only to the screen with the finished picture
Background image of the gallery on an external device
As above, for the page on the tablet only — an image in the tablet's aspect ratio helps there
Notice screen background image
As above, applies to every screen with plain notice text
Capture screen background image
As above, applies to the countdown with the live view and the preview between two shots
Background video
MP4 or WebM
Logos and backgrounds are scaled automatically. Every medium can be removed or reset to the factory state. Whether the logo appears on the start screen at all is set under Start and notices.
Every background has its own dimming value: one for each background image and one for the video. Out of the box a dark veil lies over them so that title and buttons stay readable on any motif. The veil lies evenly across the whole area and does not tint the motif.
With a calm, dark motif it pays to turn the value down — the image then comes into its own. With a bright or busy motif it belongs higher. 0 shows the motif unaltered; check on the device afterwards whether the texts are still readable.
Every image has its own value — the gallery, the final screen and the gallery on an external device included. If a screen has no image of its own, the dimming of whichever image appears there instead counts.
The shape applies to all buttons: from the pill shape through two intermediate steps to fully square. The icon buttons for printing, e-mail and QR code go along — the circle becomes a square with the same corners. A pill looks friendly and playful, square buttons matter-of- fact; at a company event the second choice often fits.
Colour and opacity of the buttons are set apart from the surface colour — one fill colour, one text colour and one opacity for the main buttons (Start, Print, Continue), for the secondary buttons (Back, Continue without decoration) and for the cancel button. The three groups sit next to each other so everything can be seen at a glance. The settings also apply to the gallery on a tablet; the admin area is not affected.
The cancel button during the shot has a group of its own because it lies above the live view: it is backed dark instead of light, otherwise it would be lost on a light motif. It also carries a light border. Anyone who wants it calmer can switch the border off — in front of a light picture the button then disappears more easily. Both apply to the labelled version in the button row as well as to the round "X" in the top right corner.
A preview above the three groups shows shape, colours and opacity right away on one example each. It sits on the configured background colour — only against that can it be judged how much of a translucent fill is left.
Without a colour of its own everything stays as it was: the main buttons follow the accent colour, the secondary buttons a light veil, the cancel button a dark surface. The cross next to a colour field leads back there at any time, even once a colour has been chosen.
The opacity affects the fill only, the label stays fully opaque. A low value lets the background image show through. On a calm motif that looks light, on a busy one the button loses its edge — there the value belongs higher.
Between the shutter and the finished picture the guest sees two waiting screens: "Preparing the shot" and "Finishing your picture". Both show the same animation with an icon in the centre. Variant, icon and speed can all be chosen.
Variant
Appearance
Rings
Two counter-rotating rings around the icon (factory setting)
Single ring
One rotating ring with a soft colour gradient
Dot circle
Twelve dots in a circle lighting up one after another
Aperture
Six blades turning like a lens aperture
Breathing circle
The icon breathes while waves travel outwards
Film strip
A film strip runs behind the icon
Icon only
No ring, the icon pulses gently
The centre holds a photo, a heart, a star, a champagne glass, sparkles or a smiley. "Own image" puts an uploaded file in that place — a PNG with a transparent background works best, larger images are scaled down to 512 pixels. "No icon" leaves the centre empty.
The speed applies to every variant alike: slow, normal or fast.
There are no separate colours here: the rings follow the accent colour, icon and text follow the text colour. The preview shows the animation exactly as the guest sees it, on the background colour you have set.
By default one screen cross-fades into the next and the buttons on it appear one after another. Four transitions are available - cross-fade, slide, from below and zoom - plus "no effect", which makes the interface jump as it used to. Three speeds go with it.
The buttons appearing can be set separately: softly, from below or popping in. The speed applies to both together.
A calm transition makes the flow look more expensive but costs a fraction of a second on every screen. For a booth with a long queue the fast speed or no effect at all pays off.
Applies to the tiles with which the guest picks a mode, layout, filter, AI style or background.
Setting
Meaning
Tile size
Small, medium (factory setting) or large
Tiles per row
"Automatic" fills the row, otherwise a fixed number from two to six
Labels
Name and description, name only, or none at all
Small tiles get a fixed width and are centred - otherwise four tiles on a wide screen would end up just as large as before. The button for choosing stays in place either way, even without labels.
An overlay is a transparent animation that lies above everything the screen shows - above live view, text and buttons. The whole flow gets a frame in the style of the party without making operation harder: taps pass through the overlay.
Each screen can carry its own file (admin area "Design & branding" > "Video overlays"): start screen, info screen before the first shot, countdown and capture, info screen before further shots as well as image preview and result. Anyone who only wants to decorate one screen leaves the other slots empty.
The overlay only lies on the screen, not in the stored image. A frame that should end up on the photo belongs in the layout.
One music file runs in a loop on the start screen, the selection screens and the info screens. From the countdown on it stays silent so guests hear the countdown and know when to hold still.
A long, calm track works better than a short excerpt - its repetition becomes noticeable after a few minutes. The volume belongs rather low: music that drowns out conversations drives guests away.
Own sounds for countdown and shutter sit where they are also selected: in the admin area "Capture flow" > "Countdowns" respectively "Camera". Like the music, the countdown sound belongs to the event; the shutter sound belongs to the camera and therefore to the device - it survives an event change.
The photo stored here fills every image slot in the layout selection and shows in the filter selection how each filter looks. Without a photo of your own the supplied sample image is used.
A landscape picture with a 6:4 aspect ratio works best (PNG, JPG or WebP).
Start and notices
Everything in this chapter belongs to the event and travels with an event switch.
Whether the logo appears on the start screen at all
Texts
Title and subtitle, for example "Anna & John" and "Tap to start"
Gallery & start buttons
Whether the gallery button appears, whether a tap on the screen starts a session instead of the start button, how the buttons are arranged (side by side or stacked) and where they sit (top, bottom, below the QR code)
Live view as background
The running camera image behind logo, title and buttons
Colours, font and the logo file itself are not here but under Appearance — they apply to the whole interface, not just the start screen. Only whether the logo is shown on the start screen is decided here.
Puts a button on the start screen through which guests can see contact details or report a problem. Label, title and content are freely chosen; the default is "Contact / report problem".
"Language selection" defines which languages are offered to the guests of this party. That is something different from the language of the admin area, which lives under "System and device settings" > "Language" and stays with the device.
A notice screen before the session — for privacy, terms of use or warnings. The content is entered as HTML and used unchanged.
Directly afterwards a custom notice screen can follow, with a freely chosen label for the continue button. It is meant for anything beyond a simple notice, such as a worded consent.
Capture flow
The menu item "Capture flow" lists the chain from the start button to the last capture — in the order the guest experiences it. Everything in this chapter belongs to the event and travels with an event switch.
An overlay on the live image just before things start — "Smile and look at the camera!". You can set the text, a timer and whether the "Start now" and "Cancel" buttons are visible. With the buttons hidden, only the timer moves things on; the duration then has to be at least one second.
The same between the captures of a multi-shot layout. Here a separate text can be stored per capture: the first text appears before the second capture, the second before the third and so on.
If the layout has more captures than there are texts, either the last text keeps showing or the list repeats from the start.
An interstitial clip is a short video with sound that slides into the flow: it plays full screen and continues on its own afterwards. Available are the clip after the start screen, a list of clips before the shot, a list of clips after the shot and the clip after the last shot.
The clip after the start screen plays immediately on the start - whether by start button, by tapping the screen or via the buzzer. Business hours, limits and a due payment are checked first: if the start is refused, no clip plays either.
The clips before the shot play right before the countdown of a picture, the clips after the shot right after the picture, before the picture preview. For each list the playback can be chosen: in order, the first clip belongs to picture 1, the second to picture 2 and so on; without an entry for a picture none plays there. Random gives each picture a clip from the list, no matter how many pictures the layout has - optionally so that each clip has played once before one repeats, or completely free.
For each clip it can be set whether it plays at all, whether a tap may skip it, how loud it is and after which maximum duration the flow continues at the latest. A sponsor clip runs through without skipping; an instruction may be cut short.
Instead of right after each capture, the guest may also decide at the very end. They see the finished picture and tap the "Retake" button; then they choose single pictures or the whole session. The old result is replaced.
Setting
Meaning
Offer a retake on the final screen
Shows the button below the finished picture
Button label
Leave empty for the supplied text "Retake"
Offer single pictures for selection
Only for layouts with several pictures
Offer the whole session for selection
Every capture once more
Maximum retakes per session
0 means unlimited
Time for the choice
When it runs out the finished picture returns; 0 means no limit
Offer it for AI portraits as well
Every retake uses up quota again
Show the info screens for a retake as well
Shows the same notice as between two regular captures
The button can be placed freely in the screen editor of the final screen.
Whether guests may cancel a running session and how the cancel looks: as a button in the row below the picture or as a round "X" in the top right corner.
With cancelling off, guests can no longer leave info screens, countdown, picture preview and processing on their own - the booth runs the sequence to its end.
Finish and sharing
After the last capture the guest sees the finished picture, gets feedback about printing and sending and is then sent back to the start screen. Everything in this chapter belongs to the event and travels with an event switch.
The final screen shows the guest the finished picture and below it the buttons for printing, sharing and finishing. A preview shows how it looks in every picture format.
The button "Open screen editor" opens an editor in which every element can be dragged anywhere — see Designing the final screen. As long as nothing has been moved there, the arrangement stays as it comes from the factory.
The short messages at the top when printing, mailing or cloud upload start at the end of a session. Appearance, size and duration can be set; a test message shows the result right away.
Sends the booth back to the start screen when nobody is operating it. By default every touch restarts the clock; switched off, it runs from the moment the screen appears and only "I am still here" restarts it. It can be set separately for:
selection and info screens
the gallery
the final screen
0 switches the respective area off, the maximum is 900 seconds. A progress bar runs along the bottom edge and can be switched off; above it a notice can be shown in which {seconds} inserts the remaining time.
In addition the booth can ask "Are you still there?" first: "I'm still here" restarts the clock, no answer returns to the start screen.
If the final screen has a time of at least 1 second, the "Done & Next" button can be hidden there — useful when the booth sends the guest back through the timer anyway. If that leaves the button row completely empty, the picture is shown larger. Without a timer the button stays, otherwise the guest could not move on.
Without this return, a half-used booth sits on its last screen, and the next guest cannot tell whether they are interrupting or free to start.
This is where you define what guests can see and choose during a session. There are three modes, each with the same structure.
Mode
Particularity
Photo
Always active
GIF
Photo series: several photos with a pause in between become an animation. Optionally repeated as a boomerang
Boomerang
Short clip from the live view that plays forwards and backwards
A fourth mode can join them: if the AI portraits run as a flow of their own (see Creative features), AI portrait appears between Photo and GIF. It is switched on there; here it gets a block of its own with layouts, display order, default layout, layout selection and print permission. As long as the mode is not running, the block is hidden.
Per mode you set:
Available layouts — at least one, otherwise the mode cannot be enabled.
Display order for the guest — the chosen layouts are listed on top with their position, the arrows move them. Guests see them in this order on the selection screen. A newly ticked layout goes to the end.
Allow guests to choose the layout — with it off, the default layout is always used.
Default layout — applies when guests may not choose; "automatic selection" leaves it to the software.
For GIF and boomerang there is more: the output format, repeats and whether printing is allowed. The repeats say how often the animation appears in the finished video; GIF and WebP loop endlessly anyway.
The GIF is a photo series: number of photos, pause between photos and display time per picture. Each photo is taken by the photo camera with the real shutter, at full resolution. The pause runs as a countdown so the guests can strike a new pose between the photos
changing poses or props are the typical GIF effect. The display time decides how long each
photo stays in the finished GIF.
The boomerang is a short clip from the live view: clip length in seconds and playback speed. The capture runs exactly as long as the clip length, with every camera and every webcam. A slow camera delivers fewer frames in that time; the photo booth measures how fast the frames came and plays them back accordingly. If a camera delivers fewer than ten frames per second, the clip runs faster than recorded - at true speed the movement would visibly stutter. The playback speed doubles or halves the result on purpose.
The output format decides what the animation becomes. GIF is the default and works everywhere, including as a mail attachment and on older devices; it also makes the largest file. WebP gives the smallest file with better colours, but older mail programs do not animate it. MP4 video is what guests need to post a capture on Instagram - a GIF cannot be uploaded there. An MP4 is extended to at least three and a half seconds because Instagram rejects shorter videos. Out of the box the boomerang becomes an MP4 and the GIF mode a GIF. Existing events keep their setting; switching is done deliberately by hand.
There is also exclude single shots from data processing - switched on out of the box. In an animation the single frames are steps of the movement; if they travel along into the cloud or into an export folder, the web photo album shows a dozen near-identical images next to every animation, and more personal pictures leave the booth than necessary. Switch the option off only when the single frames are genuinely needed - for later editing, for instance. It also applies to everything handed over after the event. On the photo booth itself the single frames remain - if they are needed after all, switching the option off and running the transfer again brings them along.
Which details of a layout the booth shows guests - separated by the two places where they appear:
Layout selection screen — title, description and number of captures.
Capture and info screens — layout title and capture counter, in the picture preview as well.
The selection screen only appears when guests may choose the layout themselves. With the choice switched off for a mode, the three upper switches have no effect.
Layouts are built in the layout editor — image slots, frames, texts, graphics, backgrounds. It has a chapter of its own; here only the assignment of layouts to modes is set.
Layouts belong to the event. A preset brings its own, and a copy of an event takes over its layouts.
Creative features
Four features change a guest's picture: the digital background swaps what is behind them, an AI portrait redraws them in a chosen style, a filter is applied to the shot afterwards, and when decorating the guest draws on it. They sit together because they act together — each one adds a decision and lengthens the session.
The digital background replaces whatever is behind the guests. It is configured in the background studio (admin area "Creative features" > "Digital background", then "Open background studio"), based on a reference photo rather than on guesswork.
Mode
How it works
When it fits
Chroma key / green screen
Separates by colour. Needs a green screen and even lighting
Fixed setup with room for a cloth
AI cut-out via AI service (local, free of charge)
The AI Service on the same computer detects the person in the image
Anywhere no green screen can be put up
AI cut-out via Replicate (web service, paid)
A model at the provider Replicate does the cut-out; nothing runs on the booth for it
When no green screen is possible and no extra software should be installed
In the studio the key colour is picked on the reference photo, along with the tolerance. The mask preview shows immediately what is being cut away.
To avoid going through the sliders one by one, use the assistant: "Set up step by step" at the top of the studio. It renders the result with the current values, asks what is wrong with it — remains of the old background, missing parts of the subject, a green fringe or a hard edge — and places two proposals next to the current image for every answer. The choice is made by comparing. If the current image remains the best choice, the next proposal is smaller. "Discard" restores the state from before the run.
The fine tuning below is split into blocks. In most cases the key colour is enough; the other sliders only matter when the cloth does not cooperate.
Block
Setting
What for
Mask
Sensitivity
How far the hue may differ
Mask
Minimum saturation
Excludes washed-out and grey areas
Mask
Minimum brightness
Excludes deep shadows
Mask
Reduce noise
Against coarse image noise at high ISO
Edges
Clean up mask
Closes speckles in the cloth, removes single hits inside the subject
Edges
Edge refinement
Pulls the mask onto hair, fringes and spectacle arms
Edges
Pull mask back
Keeps the coloured fringe out of the subject
Edges
Edge softening
How soft the edge runs
Colour spill
Spill damping
Against the colour cast the cloth throws onto the subject
Colour spill
Width of the fringe
How far the damping reaches inwards from the edge
Foreground
Protect coloured areas
Keeps a green print on a T-shirt
Foreground
Limit of the protected area
From what size an area counts as background after all
AI cutout is handled by the RAWCaptureBooth AI Service: a separate 64-bit program installed once on the same computer. The booth sends the photo there and places it on the new background. The AI models are included in the AI Service; only BRIA RMBG 2.0 has to be licensed and added yourself. Settings:
Setting
Meaning
Cut-out mode
The note below the selection shows whether the AI Service can be reached
AI model
"BiRefNet Lite" is recommended — the best ratio of quality to speed
Alpha matting
Improves fine edges such as hair, at the cost of processing time per capture
Edge adjustment
Shifts the edge of the mask; negative values remove a bright fringe around the person
AI time limit
Maximum wait per capture; raise it on slow machines
Show the background in the live view
Guests see the background before the shot is taken
This route needs no extra software on the booth: the cut-out is computed by the provider Replicate — the same one the AI portraits use. Account and key are stored once per device under “Access & accounts” and then serve both.
Setting
Meaning
Model at the provider
All deliver a soft mask; “Background Remover” is the cheapest and fastest
If the cut-out fails
Keep the original photo, or switch to the AI service on this computer
Time limit at the provider
Maximum waiting time per shot; after that the selected fallback takes over
“BRIA RMBG” is meant for commercial use: the model is trained exclusively on licensed material.
Background images are uploaded as PNG or JPG and named. Every background can be marked active:
One active background is always used.
Several active backgrounds produce a choice for guests during the session.
With the choice switched off, the background marked active in the studio is always used.
Under "Background" the studio has two more switches for the choice:
Show “Random” button: the guest has one of the active backgrounds drawn at random and can accept it or draw again. Takes effect with at least two active backgrounds.
Offer “Continue without background”: the guest can leave out the background for their shot. The photo then keeps the real background, in the live view and on later recalculation as well. For this, the choice already appears with one active background.
"Guest flow" sets when the selection appears. Before capture is the shortest flow and the right choice for long queues. After capture lets guests choose with their own photos in view — the choice is more confident, the session takes a little longer. Filter per image pays off for layouts with several photos when guests like to combine looks; for corporate events with one consistent look it is too much.
"Preview images" sets what the tiles show. The sample image is there immediately. With the guest's image the photo booth calculates every tile anew — after capture from the photos, before capture from a still of the live view. This costs time per filter, with "Filter per image" additionally per photo. On a slow computer, enable only a few filters; the note below the selection states the number of previews.
Switching off "Filters for AI portraits too" pays off when the AI styles set the look anyway — a black-and-white filter over an oil painting spoils more than it helps. Guests with an AI style then save a step; anyone taking pictures without AI chooses the filter as usual.
Besides the supplied filters, own ones can be created. The basis is a LUT file (extension .cube) — a colour table as produced by Lightroom, DaVinci Resolve or a purchased preset package. Under "Own filters" the file is chosen, named and added; the photo booth reads it right away and renders a preview image. An unusable file is rejected there, not with the first guest. The description is optional; it appears below the name for guests — where the supplied filters show their explanatory sentence.
Every own filter has a strength. It sets how strongly the colour table acts: 100 % is the template unchanged, 40 % mixes it only partly into the original. That way a template that is too strong can be tamed without changing the file.
Own filters belong to the event. They travel along with copy, export and handover, but are not available in another event by themselves. A factory reset of the area only takes back the releases — the uploaded files stay.
AI portraits redraw the guest's picture in a chosen style — as a comic, an oil painting, an astronaut. Unlike the digital background this is not computed by the booth but by a service on the internet: Replicate. That needs an account there, and the pictures leave the local network.
The access to the provider sits under "System and device settings" > "Access & accounts" > "AI Provider (Replicate)". It belongs to the device, applies to every AI function and stays put when the event changes. The instructions are there under "Setup". Two steps are easily missed:
Automatic top-up of the credit belongs switched on. If it runs out during the event, guests get their picture without a style - and nobody is standing by to notice.
A payment method has to stay stored on the account permanently. Accounts that hold nothing but credit are throttled to six pictures per minute. In operation that looks like a fault of the booth.
The event's privacy notice has to be adjusted before the feature is switched on. See Data and privacy.
"Check connection" names the reason in plain words — wrong key, unknown model, throttling, no credit or no connection at all.
Style selection in the flow decides where the guest picks the style.
Part of the photo flow — the style selection appears before the filter selection as an intermediate step. Anyone who wants no style passes it with "Continue without AI".
Separate capture mode — "AI portrait" sits as its own tile next to Photo, GIF and Boomerang. Whoever taps it then picks a style; the photo mode is left without a style selection.
The separate mode has its own layouts, default layout, layout selection and print permission, set under "Capture Modes & Layout Assignment". In the layout editor the modes additionally show an AI portrait box. It captures with the photo camera. When updating to this version, the mode takes over the photo layouts ticked "Use for AI portraits" and the values of the photo mode; nothing changes for the guests.
As part of the photo flow the Use for AI portraits tick in the layout editor still applies: guests do not get to see a layout deselected there once they have chosen a style.
Without a stored key and in offline operation the tile does not appear at all — instead of leading into a flow that ends in an ordinary photo anyway. With the quota used up it stays, greyed out, and its button names the reason instead of “Select”. Vanishing in the middle of the party would be worse: the guest would look for the mode they saw a moment ago.
Only models the provider keeps warm are offered. A community model would spend minutes booting on its first call — unusable with guests waiting. The price list below the selection shows all models side by side with their price per portrait, in the order of the selection: per quality, plus whether and at what extra cost an own background is possible. The column of the selected quality is highlighted, as is the selected model; tapping a name selects the model. The amounts come from the provider's model pages and carry their date, as there is no interface for retrieving prices. The Background Studio shows the same kind of list for AI cut-out.
Setting
When it matters
Quality
"Medium" delivers 2K and is enough for a 4x6 in print; "Low" is fine when only gallery and mail are served
Time limit per picture (under "AI Provider (Replicate)")
After that the run is cancelled and the original picture is used — without a limit the booth would stall on the provider's first outage
180 styles in twelve groups are supplied. Tick what the guest gets to choose from; "Deselect all" clears the list in one go.
The groups themselves can be adjusted: rename them, add your own and sort them with the arrows. The order applies to the guest as well — whatever is at the top is what they see first. Renaming applies to the language the admin area is currently in; the other languages keep the factory name. A group without released styles is not shown to the guest.
"Allow combining two styles" lets the guest put two styles on one image, such as "Viking" and "Oil painting". After the first style, a page of its own with its sample image asks whether a second one should be added: "Continue with one style" or "Choose a second style". The second one is picked from the group overview again, the first is marked there, and a tap on the second continues straight away. Both styles go to the provider in a single run: it costs as much as one style and counts once towards the quota. Off by default.
Three rules apply to a combination: the person only stays recognisable if both styles keep them. The Beauty rules only apply if both styles come from the "Beauty" group. And if either of the two is photorealistic, the image is labelled like a photorealistic one.
Below the supplied styles there is an area of its own for styles you create yourself.
Your own style needs only a name and an instruction for the model. The instruction is followed far more reliably in English.
Keeping the person recognisable is what the "Keep the person’s appearance" box in the edit window does. It is set from the factory and appends a sentence when sending that holds face, gender, age, skin tone, hairstyle, beard and glasses — none of that has to be in the instruction. Clearing it is only worth it when the style is meant to change the person on purpose: a different age, a fantasy creature, a caricature. The box belongs to a single style and can be changed for the bundled styles as well.
"Render example picture" sends the same person through your style that is shown on the supplied tiles. That way your style fits into the row instead of standing there with a stranger's face. The run costs the same at the provider as a guest's picture and counts towards the quota.
No supplied style names a work, a brand or a character. What is described is the look - a caped hero without an emblem, a masked vigilante, a northern adventurer. Whoever wants to get closer to one particular original creates their own style; then it is their call.
"Show the guest the groups first" switches on the intermediate step: the guest picks a group and then a style within it. With many styles released that is much quicker than one long list. If only one group has styles, the step falls away by itself.
"Show “Random” button" places a dice button below the selection. With it the guest has one of the released styles drawn at random, sees it with its sample image and accepts it or draws again. Inside an opened group, only its styles are drawn. The button only appears with at least two released styles.
Most styles place the person in a scene of their own — a superhero on a rooftop above the city, a knight in front of a castle. "Background with AI styles" decides whether that stays so:
Setting
Effect
Style may replace the background
As before: every style draws its own surroundings (default)
Keep background
The surroundings of the shot stay; only the person and their clothing take on the style
Guest decides
A "Keep background" switch appears above the style selection, off by default
Styles in the "Beauty" group keep the background anyway; the setting changes nothing for them.
Replace background. In the same sub-section, own images can be uploaded that the model places the person into — the venue, a beach, a castle hall. The chosen style applies to the whole image, including the new background. It works like the Background Studio: switch images active, set one as the main image, add labels. If several are active, the guest picks one after the style; "Random" and "Continue without background" can be switched on. Without a selection, the main image applies.
When
What happens
Model accepts several images (Nano Banana, Nano Banana Pro, FLUX.2 [pro], GPT Image 1.5)
The background is sent as a second image
Any other model
The background is not applied; the block is greyed out. The suitable models appear above it as buttons; a tap switches over
The guest has chosen an AI style
The digital background from the Background Studio is skipped for that shot: it would swap the background as well, and the AI would replace it again straight away. If the AI cannot run, for example without internet, it stays
Only Beauty styles chosen
No replacement, and the booth does not ask. A chosen digital background is applied as usual
"Continue without background"
Whatever is set under "Background with AI styles" applies
Images are reduced to at most 2048 pixels on the long edge and travel with the event when it is duplicated, exported or used in presets. Some models charge extra for every image sent along; a portrait with an own background can therefore cost a little more.
With "Allow the guest to add a wish" switched on, the guest can append a short sentence to the chosen style - for instance "astronaut on the left, knight on the right". It is meant for group pictures where each person is to become something different. The wish adds to the style, it does not replace it, and the sentence that keeps the person stays in place.
The input is off out of the box. What the guest types goes to the provider as an instruction: if they name protected characters, its content filter decides what comes of it. And typing costs time at the booth - with a queue that is the real price.
"Always mark when a wish was added" is on out of the box: where the guest writes along, the picture is more likely to show people doing something that never happened. The rule then applies even when labelling is otherwise set to "Never"; it can still be switched off.
Once the limit is reached no styles are offered; the session continues without them
Warn from
From this count the next status mail carries a note - not at once, but with the next scheduled send, and in every following one
Message when the quota is used up
What the guest gets to see then; without your own text a default text is shown
The count is listed under Counters and limits and can be reset there on its own. Only what was actually computed is counted — a failure at the provider consumes nothing.
Limit and message are also listed under Counters and limits - the same field, reachable in two places. Once the quota is used up, the guest gets a notice card with the stored text instead of the style selection and can go back or continue without a style from there.
The AI Act requires visible disclosure where a picture could falsely be taken for real. A cartoon style is not covered, a photorealistic portrait is. Out of the box exactly the photorealistic styles are labelled; the default can be switched to "Always" or "Never" and the position of the label chosen.
The operator of the booth makes that call — under the regulation they are the one deploying the system.
The style is chosen in a step of its own right after the mode selection, before the filter and layout selection: it determines which layouts fit and whether a digital background is still asked for. Filter and AI style can be combined: first the model redraws the picture, then the filter is laid over it. If "Filters for AI portraits too" is switched off in the filter settings, the filter selection is skipped after a style. All pictures of a session get the same style.
The step does not appear at all when no key is stored, when the booth runs in offline mode or when the data-minimising default is switched on. In none of these cases does the guest see an error message.
While the picture is being computed the waiting screen says that the portrait is being drawn and shows the remaining time. The duration is measured on every run, so the display appears from the second shot with AI onwards.
In the layout editor you can set per layout whether it comes into question for AI portraits. Out of the box all of them do. Once the guest has chosen a style, deselected layouts are no longer shown - and if multi-picture layouts are not released for AI portraits, only those with a single placeholder remain. Whoever chose "no AI" still sees them all.
The capture goes to the provider in the crop of its layout slot. The model therefore computes for exactly the format that will be seen; otherwise fitting it in would cut away the very part it worked on.
Three reasons can only be fixed by the operator: missing credit, an invalid key or none at all. They go out as errors and trigger the immediate status notification, if set up - otherwise the event would run on without anyone learning of the missing portraits.
Lets guests draw on the finished picture and add stickers before sharing or printing.
Area
Settings
Display & flow
Whether the feature is active and whether guests are asked first
Tools
Stickers, drawing, eraser, text, text colour, font selection — each can be enabled separately
Defaults
Brush colour and brush size when opening
Custom stickers can be uploaded; they appear in the sidebar before the built-in ones.
Printing at the event
This area governs how printing works at this party. Which device prints and how it hits the paper is set separately under Setting up the printer, with the device.
How many prints are allowed in total is set under "Counters & limits". That is also where you can see how much has been printed — the most reliable basis for the question whether the paper will last until midnight.
Cloud and e-mail
This area describes the routes by which a picture leaves the booth. The accounts behind them — cloud sign-in and outgoing mail — belong to the device and live under Access and accounts.
Dropbox, Google Drive, pCloud, Nextcloud, FTP server, RAWCaptureBooth self-hosted server or export to a folder
Upload mode
Upload automatically or ask first
Create subfolders per category
Sorts at the target into one subfolder per category, by default "Layout-Bilder", "Roh-Bilder", "Bearbeitete Bilder" and "Animationen"
Subfolder names
Own names per category, for instance when the customer expects English folders. The self-hosted server always uses the default names because it sorts the pictures into its album by them. A slash adds another level: "Fotos/2026" are two folders inside each other, three at most
Upload later when offline
Jobs go to the outbox and are sent automatically later
You can also decide what is uploaded besides the finished layout picture:
Processed individual captures — the single pictures as they appear in the layout, with digital background and filter. Makes the upload longer.
Unprocessed camera originals — explicitly not recommended: raw files can reach 50 MB depending on the camera.
Nothing is lost: uploads and mails go to the outbox and are retried as soon as the connection is back. The state of the queue is shown under "Outbox / Send later".
QR codes
Two different QR codes that are easily confused:
QR code
Where it is
Where it leads
Web photo album
On the start screen
To the gallery of the whole party
Single picture
After the capture, in the gallery and optionally on the printout
Shows the QR code permanently on the start screen so guests can pull the gallery onto their own phone.
Setting
Meaning
QR code URL
Determined automatically from the active upload target, or set manually from base URL and parameter
Hide in offline mode
Prevents a QR code that leads nowhere while there is no network
QR style, QR colour, text colour, background colour
The look of the card; the background colour fills the card including the area behind the QR code
Show translucent
Like the gallery button; with a translucent card the square style is recommended
Glow effect
Animated outline in the accent colour
Lines above and below the QR code
Custom text per line; each one can also be hidden completely
Both lines of the card appear in the language of the guest out of the box. A custom text takes their place and then applies to every language alike — useful for a note that is meant in one language anyway, the name of the couple for instance. With both lines hidden the QR code stands alone on the card.
Gives a guest exactly their picture, without it having to appear in the web photo album.
Setting
Meaning
Enable single-image download
The master switch
QR code creation
Prepare immediately shows the code faster but uploads every picture. Only on request uploads only when a guest actually wants the code. With the automatic cloud upload on, Only on request saves nothing: the upload then creates no share link and the layout image is uploaded a second time for the QR code
Show QR code
Only relevant when the automatic upload also uploads edited single images or RAW files. As soon as the layout image is uploaded shows the code without waiting. Only once all files of the session are uploaded is needed when the self-hosted web server shows all captures of the session behind the code
The single-image code can also be placed on the printed image. This is set up in the layout editor with a QR element targeting "Single-image QR"; it deliberately does not appear in the stored photo. How long a print job waits for the address is set in the "Timeouts & error messages" section — ten seconds by default.
Both features need an upload route. If cloud upload is off or privacy by default is on, they are not offered at all.
Gallery at the booth
The gallery shows the pictures of this party on the booth. It opens through a button on the start screen and only shows the pictures of the loaded event.
Takes the pictures into the gallery. Off means no new pictures, neither at the booth nor on an external device
Sort order
The order in which pictures appear
Maximum number of gallery pictures
Limits the display only (newest first); nothing is deleted
Split gallery into pages
Page through instead of one long list
Pictures per page
1 to 200, only effective with paging enabled
The button on the start screen is independent of this: it can be hidden under "Start screen & info screens" > "Customise start screen" without stopping the gallery. Useful when the pictures are only meant to be shown on a tablet and not at the booth itself.
"Original format" shows every picture in its own aspect ratio; the other modes use uniform tiles
Tile format
Aspect ratio of the tiles, only effective with uniform tiles
Back button
"Fixed" scrolls it away with the pictures, the other setting keeps it visible
Headings
"Gallery" and "Latest pictures" can be renamed or hidden completely
If the text fields stay empty, the supplied headings appear — translated into the language of the guest. A custom text applies to every language alike. With both headings hidden the gallery starts directly with the pictures; on a small screen that gains a whole row.
Each of these can be switched off for the gallery separately, even when the feature is offered on the final screen.
With privacy by default active, the gallery disappears entirely — session data is deleted right after the session. The only exception is privacy mode on the tablet, see below.
The same gallery can run on a tablet or phone in the same network, without occupying the screen of the booth. The address is the one of the photo booth with /galerie added. It is switched on in the admin area "Gallery" > "Gallery on an external device".
This helps when
an attendant picks out and prints pictures for guests while the booth keeps shooting,
the queue in front of the booth should not grow because someone is browsing,
guests should be able to look through the pictures in peace somewhere else.
The page behaves differently from the gallery at the booth on purpose: no back button, no return to the start screen after inactivity, and new pictures appear by themselves without closing an open image or jumping back to the top.
Display and order are taken from the gallery at the booth if wanted. Anyone who prefers one continuous list to scroll on the tablet sets them separately.
If a gallery background image is stored under Appearance, the page shows that one; an image just for the tablet is available there as well — useful because a tablet often has a different aspect ratio than the photo booth screen. the headings are set separately from the gallery at the booth, which pays off wherever the tablet stands beside the booth all evening.
A background image set at the photo booth is shown on the page as well - the tablet then looks like the booth beside it and not like some foreign website.
If the tablet is there for guests to use themselves, they should print or send their own photo there, but not browse through the photos of the whole evening. That is what privacy mode is for (admin area "Gallery" > "Gallery on an external device" > "Privacy mode").
The tablet then no longer shows a gallery but waits for new photos. A new photo appears for the set display time, optionally opened in full size if it is the only one ("Open a single photo in full size"), and disappears afterwards. The time runs from the moment the photo is taken, not from the first look at it - the duration should therefore let the guest get from the booth to the tablet and still leave time there.
Whether the remaining time is visible can be switched on separately ("Show remaining time"). Useful where guests would otherwise be surprised when their photo disappears; for a plain page it stays off.
In this mode the photo booth no longer hands out older photos to any device in the network, not even via their address. The gallery on the booth's own screen is not affected.
In the full view a picture can be handed to the device's share menu - on an iPad that includes AirDrop, on Android it is the usual share sheet. The button only appears when the page was opened over an encrypted connection: browsers grant a page access to that menu only there. This applies to both systems alike. The wording of the button can be set in the admin area under "Label of the share button"; left empty, the page chooses for itself. It is switched on in the same area as the gallery for external devices: admin area "Gallery" > "Gallery on an external device".
Slideshow and screensaver
When the booth sits idle for a while, it can show the pictures taken so far. That is also the best advertisement it has: whoever sees other people's pictures joins the queue.
Your own images can be shown between the guest photos — a sponsor banner, the company logo at a corporate party or a note from the host.
Setting
Meaning
Show ads
The main switch; off by default
Ad after every
After how many guest photos an ad appears
Display time of an ad
In seconds; 0 uses the display time of a photo
Image files
Several at once (JPG, PNG, WebP, GIF)
With several ads stored they take turns: the first one, after the next block the second and so on. As long as there are no guest photos yet, only the ads run — during setup before the party the booth already shows the customer's logo.
The ads apply to the slideshow in the booth and to the second screen, not to the display type Video. They belong to the event and travel with copies and exports.
A video (MP4 or WebM) plays silently in an endless loop. With a different aspect ratio you can choose whether it fills the screen and gets cropped, or appears with black bars.
Useful for sponsor clips, wedding films or the operator's own advertising — anywhere the guests' pictures should not be on public display.
For a second monitor, open the address http://localhost:8000/slideshow in a separate browser or kiosk window on that screen. The slideshow runs there permanently, regardless of what guests are doing at the booth. If the photo booth port was changed, the address carries the new number instead of 8000; the admin area shows it already filled in.
Pay-per-use
With pay-per-use active, the guest pays before the capture begins. It is meant for public installations — trade fairs, funfairs, bars — where the guest pays rather than the host.
The Stripe access belongs to the device and lives under Access and accounts. Here you set whether and how payment is taken. Setting up Stripe, PayPal and several booths is described in Setting up pay-per-use.
Every session and every print is a payment of its own
few, rather expensive sessions
Credit code
The guest tops up once and gets a code; each session is deducted from it
many sessions per guest, groups, trade fairs
Reservation
The guest reserves an amount on their card or PayPal and gets a code; after the event only the part used is charged
parties where guests do not want to decide in advance how much they spend
The difference lies in the fees: Stripe charges a fixed amount per payment (around 0.25 EUR for EU cards) plus a percentage. For a 3 EUR session, a single payment loses around a tenth to fees; for a 20 EUR top-up it is just under 3 percent.
With Allow one-off payment without a code the credit model also offers single payment — for guests who only want to take one picture.
Each capture mode has its own price, 0 means free of charge. That way an AI portrait can cost more than a photo.
A print costs a base price per job plus a price per copy. The copies included only apply to prints right after the session; a print from the gallery always costs. On the tablet showing the gallery nothing is printed then — the guest prints at the photo booth.
With a code the price can be tiered: guests who do many sessions pay less from a certain session on. Counting is per code, across all photo booths with the same Stripe key. Without a code, i.e. with single payments, the base price always applies.
Type of tiers: a discount in percent on the mode's price or a fixed price per tier and mode.
Up to three tiers, each from session — for example 10 % from the 5th session and 20 % from the 10th. A tier with “from” 0 stays unused.
Price tiers for prints: the same per copy. The base price per order stays; included copies do not count. If an order crosses a tier boundary, each copy costs the price of its tier.
The overview before code entry lists the tiers. After the code is entered, the booth shows the price that applies to the next session.
With Show overview before code entry a first screen explains the process in three steps and lists the prices per capture mode and for printing. From there guests go on to code entry, to topping up or, if allowed, to a single payment. New events show the overview by default.
With a credit code:
The guest taps the start screen and enters the code. A hand scanner reading the code from the phone types it in like a keyboard.
The booth shows the credit and the price.
In the mode selection each tile shows its price. Whatever the credit no longer covers is greyed out.
The charge is made as soon as the result is on screen. If a session is cancelled before that, it costs nothing.
At the end the booth shows the remaining credit and offers Another session without typing the code again.
With single payment the guest pays after choosing the mode, because only then is the price known.
The amounts appear as buttons, up to four. With Allow a custom amount the guest sets the amount between the smallest and largest custom amount.
The payment page at the photo booth opens directly on screen or appears as a QR code for the phone. The QR code is usually the better choice: the card number is not typed in public, Apple Pay and Google Pay work, and the booth is free again sooner. After paying on the phone, Stripe takes the guest to the return URL — the phone cannot reach the booth's local address.
If Offer top-ups at the photo booth is off, the booth only accepts codes. The notice for guests without a code then tells them where credit is available — for example at a tablet used as a top-up station, see Setting up pay-per-use.
After payment the booth shows the new code in large type. The guest remembers it or takes a photo. If they entered an email address when paying, the code is also on Stripe's receipt.
With a reservation the guest does not pay in advance but authorises a maximum amount. Stripe reserves it on the card or with PayPal; money is only taken when settling and only for the part used, the rest is released. On screen everything works as with a credit code: enter the code, do the session, and at the end the booth shows what is still available.
The amounts to reserve appear as buttons, up to four; there is no free amount here. Settle decides when the money is taken:
when the photo booth is closed, at the latest after the deadline — the booth settles this event's reservations before it closes. Suits an evening with one booth.
after the deadline — for events over several days and several booths that do not finish at the same time.
The deadline until settlement counts from the reservation, at most 144 hours. Any running booth with the same Stripe key settles — also after switching events and at the next program start.
Open reservations lists all codes on this Stripe account that have not been settled yet, with amount, settlement time and expiry. If one expires in less than two days, a notice appears.
Usage below 0.50 EUR cannot be charged; the reservation is then released in full. The same applies to a reservation whose payment the booth never confirmed: if the guest left before the confirmation, they never saw the code.
A code has eight characters without easily confused letters and digits (no 0/O, no 1/I). After five wrong codes, entry is blocked for a minute; each further block lasts longer.
Code is valid “only at this event” is the normal case. “At all events of this Stripe account” suits credit that should work across several events, for example a trade fair over three days with one event per day.
When the network fails “allow sessions, charge later” keeps the queue moving: the booth remembers charges it cannot make right now and makes them as soon as Stripe answers again. A wrong code, however, only shows up when the charge is made later.
Under Manage codes the booth shows the credit, the event, the status and the latest transactions for a code — no matter at which booth it was topped up.
Block stops a code, for example when a guest has lost it. Unblock releases it again.
Refund remaining credit deducts the credit and refunds it to the original payment. Whatever cannot be refunded, for example on a free code, is back on the code afterwards.
Create free code issues a code with credit without anyone paying — as a prize or as compensation.
Close event settles open reservations and ends all codes of the event; afterwards none of them starts a session. The remaining credit is handled as set under Remaining credit:
Setting
When closing
stays, refund on request
The credit stays on the code; refunds go through Refund remaining credit
refunded automatically when closing
Every code with credit is refunded to the original payment
In demo mode the payment is only simulated: no money changes hands, and no Stripe account is needed. That suits trade fairs and demonstrations. Codes from demo mode only work at this booth.
For a real test run, a Stripe test key (starting with sk_test_ or rk_test_) belongs under Access and accounts. Everything then runs as it will later, only with Stripe's test cards instead of real money.
Setting up pay-per-use
This guide leads from the Stripe account to the first paid session. What the individual settings mean is described in Pay-per-use.
The money always goes straight to the operator's Stripe account. RAWCaptureBooth does not sit in between and sees no payments.
Accounts are available at stripe.com. Stripe asks for the company, bank details and ID; only after this check are real payments paid out. Testing is possible before that.
Under “Settings” > “Public details”, enter the company name, contact address and the link to your own terms and conditions. Stripe shows them on the payment page.
In the Stripe dashboard under “Developers” > “API keys” you find the secret key. Safer is a restricted key that can only do what the photo booth needs:
Resource
Permission
Checkout Sessions
Write
Customers
Write
PaymentIntents
Write (for the reservation, otherwise Read is enough)
Refunds
Write (for refunds from the admin area)
The key belongs under admin area "Access & accounts" > "Payment provider (Stripe)". Enter the test key first (starting with sk_test_ or rk_test_), the real one only after the test run.
No webhook is needed: the photo booth asks Stripe itself for the state of a payment. A webhook set up for an older version can be removed.
In the Stripe dashboard under “Settings” > “Payment methods” PayPal can be activated; Stripe asks for the PayPal business account. Apple Pay and Google Pay are usually already switched on for Stripe's payment page. They appear when the guest's device supports them — on the phone, not on the photo booth screen.
Nothing needs to be set at the photo booth: the payment page shows what is active in the Stripe account.
Codes live at Stripe, not on the booth. Every booth with the same Stripe key knows the same codes, and a freshly topped-up code works at every booth straight away.
Enter the same key on every booth.
Bring the same event to all booths by handover or export (see Managing events). The event's access code stays the same; the booths use it to recognise that a code belongs to this event.
Code is valid “only at this event” is then enough. For credit that should work across several events, choose “at all events of this Stripe account”.
Every charge carries the booth's computer name. In the Stripe dashboard each code therefore shows which booth took which amount.
With a long queue, a separate station takes load off the booth: a tablet at the entrance handles the top-ups, and the photo booth only accepts codes.
Tick Release top-up station (admin area "Remote management" > "Access from the network"). The address is shown below, for example http://192.168.1.20:8000/guthaben.
Connect the tablet to the same network and open the address in the browser.
Lock the page in full screen: on Android with a kiosk browser, on the iPad with Guided Access (Settings > Accessibility).
At the photo booth, switch off Offer top-ups at the photo booth if only codes should be entered there, and point to the tablet in the notice for guests without a code.
The guest chooses an amount on the tablet and pays via the QR code on their own phone — or with Pay on this device directly on the tablet. The tablet then shows the code in large type. An existing code can be topped up there as well.
The start page shows the event's logo and title, explains the process in three steps and lists the prices for captures and printing — the same as at the photo booth. With Check balance the guest enters their code and sees what is left on it, along with the latest transactions. A sentence of your own, for example about payment methods, goes into Notice on the top-up station (in "Payment & payment terminal"); it appears highlighted above the amounts.
The station can only top up: the operating interface and admin area stay locked for the tablet unless they are released separately. With Require PIN the tablet asks once for the network PIN.
The guest types the code with the tablet's keyboard. With Show on-screen keyboard the page shows its own keypad instead, for example on a second monitor with a touchscreen. Colours and buttons of the page follow the photo booth's appearance.
With reservations the booth settles by itself (see Pay-per-use). If no booth is running any more, an open reservation can be captured by hand in the Stripe dashboard under “Payments”. The code's transaction history under “Customers” shows how much was used.
Unused credit stays on the code. In the Stripe dashboard it appears with the customer under “Credit balance”. A refund is made there on the original payment; afterwards reduce the customer's credit balance by the same amount so the code no longer works.
Refunds are easier in the admin area: show the code under Manage codes and choose Refund remaining credit. At the end, Close event ends all codes of the event; what happens to remaining credit is set under Remaining credit (see Pay-per-use).
Three numbers per event: sessions total, prints total and AI portraits total. They are the basis for invoicing and for the question whether the paper will last.
They are reset under "My events" > "Counter reset"; the pictures themselves are kept.
Define when the booth can be used at all. Outside that window an overlay covers the screen, with a freely worded heading and message.
Combination
Effect
Only opening time set
Available permanently from that time
Only closing time set
Available until that time
Both set
Available in the window between them
A period can be set on top of that. Without a date the times apply every day, with a date only between the start and end date, the end date included. One date is enough: a start date alone frees the booth permanently from that day, an end date alone locks it afterwards. A window running past midnight counts towards the evening before - anyone open until 2 a.m. does not close at midnight on the end date.
Case
Available from
Closed from
Valid from
Valid until
Party on 12 Sep, 3 p.m. until 2 a.m.
15:00
02:00
12 Sep
12 Sep
Trade fair stand 10-12 Mar, daily 9 a.m. to 6 p.m.
09:00
18:00
10 Mar
12 Mar
Permanent location, daily 10 a.m. to 10 p.m.
10:00
22:00
-
-
Release the booth only from the setup day
-
-
10 Mar
-
Operating hours are not the same as the period of an event: the period decides which event is loaded automatically; the operating hours decide whether the loaded booth can be used right now.
Buzzer, lighting and relay
Everything in this chapter belongs to the device: it is attached to this booth and stays unchanged when events are switched.
For guests a buzzer is the more natural control than a screen — anyone can hit a button. Technically a wired buzzer identifies itself as a keyboard or mouse.
Setting
Meaning
Enable buzzer control
The master switch
Assigned key
Via "Capture key" and then pressing the buzzer. The left mouse button cannot be assigned because it is the normal control
Behaviour when triggered
Capture immediately or "start countdown" — the latter gives guests time to pose
Debounce time
Blocks further triggers so that repeated banging produces only one picture
Automatic start after
0 is off; otherwise the countdown starts by itself after this time
Assignment with several buzzers
"Alternating per picture" gives each buzzer one picture in turn; the on-screen hint then names the buzzer whose turn it is
Buzzers are told apart by key, not by device: two buzzers are two keys, even when they share one USB receiver.
A wireless buzzer needs no cable and is identified by its Bluetooth address. That address is fixed in the device, unique worldwide and survives any firmware update.
Setting up: start "Search buzzers" and press the buzzer to be assigned while the search runs — it then shows up as "currently pressed". Registered wireless buzzers appear in the "Buzzer / key control" section, where you set what they trigger.
Setting
Meaning
Warn on low battery
The warning stays until acknowledged
Warn on connection loss
Short dropouts are ignored; the message names the likely cause
Grace period before reporting loss
How long reconnecting is attempted before the loss is reported
Notice when a buzzer falls asleep
Explains to the next guest why the buzzer does not react at first
Debounce and wake-up window
Stop a wake-up press from counting as a second capture
Controls the connected LED lighting: continuous light during operation and a trigger light at the moment of capture. The trigger light is enabled in the camera area ("Enable LightControl trigger light", photos only).
The photo booth reports steps of the session to the outside — to an address on the network or to a program on its own computer. This ties in equipment that has no area of its own: a ring light with its own software, home automation, a script written in-house.
Nine events are available, from session start to session end. Each carries its own values, such as the capture mode, the countdown duration or the printer and number of copies.
The photo booth reports steps of its session to the outside: to an address on the network or to a program on its own computer. This ties in equipment for which there is no area of its own.
It is switched on in the admin area "Lighting / accessory control" > "Triggers for external programs". This chapter describes what arrives there and how to work with it.
A few tasks from practice that can be solved with it:
Control a ring light or flash system that comes with its own software. Ramp up during the countdown, switch off at the moment of capture or on a cancel.
Switch a socket as soon as a session begins, and off again after the final screen - through home automation.
Pass on finished pictures: copy, rename, drop into a folder, hand over to an image editor.
Keep count of how many sessions and prints have added up, without asking the photo booth for it.
Fog machine, light organ, confetti cannon - anything that reacts to a signal.
Run a display alongside, such as a second screen in the next room showing what is happening right now.
The photo booth expects no answer and evaluates none. It only reports.
Choose the target. Either an address on the network or a program on the photo booth's computer. For a program, the full path including the file extension belongs in the field.
Tick the events. Only what is ticked gets reported. Anyone who first wants to find out what arrives when ticks everything and removes later what is not needed.
Test. The "Test event" button sends a single event with sample values and shows the command that actually went out - and, on failure, its cause.
The countdown is over. Follows every "Countdown begins" exactly once - either at zero, immediately before the shutter release, or because the countdown was cancelled before that.
Value
Content
1
completed when zero is reached; aborted on a cancel
My-Script.bat countdown_stop completed
A countdown is cancelled when the guest cancels or the session ends for another reason before zero is reached. No capture_start follows aborted - a ring light that ramped up during the countdown should switch off again here.
The camera has delivered a picture and it is on the hard disk. Arrives only with a connected photo or system camera, not with a webcam - there the picture is created in the interface.
The target path is already fixed before anything is computed. A script can therefore prepare itself instead of searching the folder. The file itself does not exist yet at this point.
With a webcam the file_download lines are missing. If the guest cancels, session_end arrives without the lines before it. If the cancel falls into a countdown, countdown_stop aborted arrives immediately before session_end. Printing and upload only arrive when they are switched on and the guest triggers them.
The values are available as %~1, %~2 and so on. The tilde belongs there: values containing spaces, equals signs, commas or semicolons are passed in quotation marks, and %~2 removes them again. With %2 they would stand in the text.
@echo off
if /i "%~1"=="printing" (
    rem %~2 = file, %~3 = number of copies, %~4 = printer
    echo Printing %~3 copies on %~4
)
Simple values without special characters - such as a countdown duration - arrive without quotation marks and can also be read with %2.
By default the countdown duration goes out in seconds. Some devices expect milliseconds - for that there is the tick box "Give the countdown duration in milliseconds" in the admin area. 3 then becomes 3000.
If a countdown animation stays dark or is over instantly, this unit is almost always the reason.
The files can be downloaded, put into a folder of their own and entered as the target in the admin area. They are meant as a starting point and may be changed.
Sends one command each on countdown and on shutter release to a device on COM3 and switches it off again after a cancelled countdown - the pattern ring lights and similar controllers work by. Commands and port are entered at the top of the script.
A program that listens on an address and shows every event. For trying out the network route before the actual target device is connected. Requires an installed Python runtime.
Systems such as Home Assistant, ioBroker or Node-RED accept a call over the network. Their address is entered as the target, for example:
http://192.168.1.50:8123/api/webhook/photobooth
An automation is then triggered there. The event is in event_type, and because the values come along as parameters, session start and session end can be told apart without setting up a separate address for every event.
If the system expects JSON instead of parameters, the format is switched over in the admin area.
A script that looks for neighbouring files in the photo booth's folder will not find them - it runs in its own folder. Paths inside the script should therefore be given in full or based on %~dp0, its own folder.
That must not happen, and it is then not down to the trigger: the photo booth waits at most the configured time limit and then carries on, even if the target does not answer. The time limit can be shortened when a sluggish device is involved.
That is usually correct: countdown start, countdown end and shutter release arrive before every single shot. With a four-picture layout, therefore four times.
Access and accounts
This is where the credentials live. They belong to the device and apply to all events. What a party does with them is set with the event: under Cloud and e-mail and Pay-per-use.
The split has a practical reason: an event package handed on never contains credentials. Sending an event as a template does not send your Dropbox account with it.
Dropbox, Google Drive, pCloud, Nextcloud and the RAWCaptureBooth self-hosted server are supported.
Signing in runs through the browser: an assistant opens the provider's authorisation page, access is confirmed there and the code is carried back into the booth.
A base folder can be set as well. Every event creates its own folder underneath, named after its identifier.
An ordinary cloud account, set up like Dropbox: click Connect to pCloud, confirm in the browser, done. Whether the account lives in the European or the American data centre is detected automatically — the choice made when creating the account has no effect here.
Base folder and folder for the single-image QR codes work as with Dropbox. If left empty, the folder RAWCaptureBooth is created with Einzelbild-QR underneath.
Worth it for anyone already running their own Nextcloud: the images stay in-house and the sharing links for the QR codes are created there automatically — a root URL as with the FTP server is not needed.
All that is required is the Nextcloud address, the same one used to open it in a browser. A click on Connect to Nextcloud opens the sign-in page; after confirmation RAWCaptureBooth receives its own app password. The account password itself is never stored, and the app password can be revoked individually in Nextcloud at any time without touching the account. Disconnect withdraws it from here as well.
No separate app has to be registered in Nextcloud. The route works with every installation, even behind a portal that allows no redirect back to the booth computer — unlike Google, the sign-in can therefore also be done from a tablet.
Base folder and folder for the single-image QR codes work as with Dropbox. If left empty, the folder RAWCaptureBooth is created with Einzelbild-QR underneath.
Useful where a web space already exists and the pictures are meant to live under your own address instead of a cloud provider's. Two entries are needed that are easily confused: the base folder on the server — the path the FTP account sees — and the root URL — the address under which exactly this folder is reachable on the web. Both point at the same place but rarely carry the same name: /httpdocs/photos on the server may be https://example.com/photos on the web.
FTP, FTPS and SFTP are available as protocols. FTP transmits password and images in clear text; where the provider allows FTPS or SFTP, those are the ones to choose.
The folder for the single-image QR codes can be chosen freely. If the field stays empty, a subfolder below the base folder is used. If the chosen folder sits beside the base folder instead of below it, the root URL does not reach it; its own address has to be entered as well. The admin area says so while it is missing.
An access that has been set up can be removed again with the Remove FTP access button. It only appears while something is stored and clears server, user name, password, folders and addresses in one step. Emptying the fields is not enough: an empty password field means “keep the existing password”.
Your own web server hosting the web photo album. It needs the server URL and, if the server asks for them, a user name and password. Which event folder is meant follows from the event's access code, so that code lives with the event rather than here.
A server that has been entered can be removed again with the Remove self-hosted access button. It only appears while something is stored and clears address, user name and password in one step. Emptying the fields is not enough: an empty password field means “keep the existing password”, and an empty server URL is rejected when saving.
The Stripe key — one account for all events. Leaving the key field empty keeps the key already stored. A restricted key works as well as the secret key.
Amount, trigger and flow of the payment are set with the event.
No webhook is needed: the photo booth asks Stripe itself for the state of a payment. PayPal, Apple Pay and Google Pay are switched on as payment methods in the Stripe account; nothing needs to be set at the photo booth for that.
Demo mode only simulates the payment and works without a Stripe account. For a real test run a test key is the better choice, see Pay-per-use.
Outbox
The outbox is the device's queue. Whatever cannot go out right now — no network, an unresponsive server, a failed mail — lands here and is retried automatically later.
It deliberately belongs to the device rather than to an event: the individual jobs know which event they belong to and outlive an event switch. Yesterday's upload still goes out even when the next party has long been loaded.
Everything about the way into the admin area: the PIN, the automatic logout and the hidden area in the bottom left of the screen that opens the login dialog.
While the factory default 0000 is in place, anyone can get in. The hidden area can be given a press duration — it then has to be held for a few seconds so that a guest does not hit it by accident.
The automatic logout counts from the last activity. With "Input extends the login" switched on — the state the photo booth ships in — keyboard, mouse and touch count as well. Switched off, only what is actually saved or loaded counts; writing in a field for longer then ends in a logout in the middle of the work.
With the switch on, every change is applied immediately and the save buttons disappear; that includes the layout editor.
Not affected are buttons that do something instead of saving — test print, factory reset, retry cloud upload and the like. Those still need a deliberate click.
One subsection is shown; you switch through the sidebar or the search
All below each other
The former presentation: all subsections of a menu item stacked
Plus: which area appears when the admin area opens, whether accordions start expanded or collapsed, and whether the buttons for the on-screen keyboard and the layout editor are visible.
Reopen the section last viewed returns to exactly the place where the admin area was left. This only applies as long as the login is still valid — after signing out and once the session has expired, the configured default section appears again.
The guest screens are designed for Full HD — 1920 × 1080 in landscape, 1080 × 1920 in portrait. The photo booth converts this size to its own window: on a smaller screen everything becomes correspondingly smaller, on a larger one bigger. Nothing needs to be set for that.
The first line in the area states the result — how large the window of the photo booth is and at what percentage the interface runs there. On a screen with 1920 × 1080 that is 100 percent, on a Microsoft Surface with 200 percent display scaling in Windows about 71 percent.
Reference width and reference height below are something else: they hold the resolution of the connected screen and thus define the format of the editing area in the screen editors. The photo booth measures them at start and follows along when the screen is swapped. To have it right away, click "Adopt from screen" — the button only appears when the stored and the measured resolution differ. Collapsed, the area then reads "Screen changed". These values do not affect the size of the interface.
If the conversion does not fit on a particular screen, "Manual (fixed zoom factor)" with a self-chosen value helps.
"Live image display" below only concerns the camera image: whether it fills the screen and how much margin remains. Buttons and texts are unaffected.
The interface is drawn by the graphics card. That is the factory setting and usually the right one: scrolling in the admin area and in the layout editor is twice as smooth, transitions and videos do not stutter, and the processor stays free for camera, processing and upload.
The tick "Turn off graphics acceleration" is the emergency exit for devices whose graphics driver mangles the display. This shows as a completely black live view although the photos are fine, or as black areas, stripes and frozen pictures in the interface. After setting it the software has to be restarted; the processor then draws again and the display becomes noticeably more sluggish.
Below the tick it says what the open display is currently drawing with. If the admin area is opened from a tablet on the network, the information applies to that tablet.
A current display engine is required: "Microsoft Edge WebView2 Runtime", verified with version 153.0.4234.32. It normally keeps itself up to date; its version is shown in the Windows settings under "Apps" > "Installed apps". If it is considerably older, reinstalling the runtime from the Microsoft website helps.
After these times the software aborts a step that does not respond and shows an error message. They are an emergency brake against hanging, not a waiting time for guests.
They only need attention when steps abort during operation that actually work: a slow camera, a weak computer or a thin mobile connection need longer than the default. Set too tight, the booth discards running captures and transfers for no reason.
The values depend on camera, computer and network and therefore apply to all events.
Puts the booth deliberately into offline operation. The area lists what is then not offered — cloud upload, mail sending, web album QR codes and the AI portraits. The latter need a provider on the internet: in offline mode neither the style selection nor the tile of the AI mode appears, and a running session delivers the picture without a style instead of running into a wait.
When the network drops in the middle of the party, there is no time to look for the area. The same switch therefore sits at the top of the admin menu, below "Save automatically", and takes effect immediately. Anyone who does not want to open the admin area at all finds it in the booth's quick settings menu as well.
The photobooth interface can be opened remotely in a browser — even when the booth sits in a restaurant's Wi-Fi or behind a mobile router. Neither a VPN nor port forwarding is needed.
This helps when something has to be adjusted during an event without driving there: swapping a layout, checking the printer, resetting a counter.
Remote access is not set up on the photobooth but where it reports its state: in the management portal or in the backend of your own web server. A dedicated address is created there for each device. The software picks it up the next time it reports in.
Only the main switch stays on the photobooth (admin area "Remote management" > "Remote access to the interface"). Without it no connection can be opened.
The connection is not open permanently. It is opened one session at a time and closes by itself after the configured time — four hours by default. It can be opened on the photobooth or remotely; the badge in the section header shows while something is open.
When opening remotely, allow for one reporting interval: the software only picks the command up the next time it reports in.
Once the photo booth is on a network, every other device there reaches it through its address in a browser — a tablet, a phone, the laptop at the next table. This section decides what those devices are allowed to use (admin area "Remote management" > "Access from the network").
Out of the box only the gallery for external devices gets through from the network. The operating interface and the admin area stay reserved for the photo booth screen until they are released here.
The gallery has no switch of its own in this section — it is switched on and off where it belongs (admin area "Gallery" > "Gallery on external device"). All that appears here is how it currently stands.
The top-up station shows only the page for topping up credit — for a tablet at the entrance, see Setting up pay-per-use.
Below the switches stand the complete addresses under which the photo booth is currently reachable — with IP address and port, ready to be typed into the browser of the other device. They appear for a blocked area as well, so it is clear what to enter once it is released.
Several addresses mean the computer has several network cards — usually LAN and Wi-Fi. The right one comes from the network the other device is on.
With the encrypted connection switched on, each area also shows an https address with its own port. Only over that one does the tablet offer the device's share menu.
The number after the colon in the address is the port. It is 8000 by default. If another program on the same computer occupies that number, the photo booth does not start — it never even reaches its own screen. For that case the number can be changed in the "Photo booth port" field. Allowed values are 1024 to 65535.
The change takes effect after the next start of the software. While the photo booth is still running on the old number, a note below the field says so. After that the new number applies everywhere: in the addresses above, for devices on the network, for the gallery on an external device and for the slideshow on a second monitor.
The Windows firewall is not an issue here: its permission is granted for the program at first start, not for a single port number — it then applies to every port the photo booth uses. Only a hand-made rule for port 8000, or the permission of another firewall, would have to be adjusted.
The admin area is no help in that case: it is part of the photo booth and only reachable once it runs. So the software asks during startup instead. If the port is in use, it looks for a free number nearby and offers it in a dialog:
Yes — the photo booth starts on the new number right away and remembers it. Nothing else is needed; the admin area then shows the new number in the field.
No — startup is cancelled, with the familiar notice about the occupied port.
A released area can additionally be put behind a PIN. The "Require PIN" box sits at each of the three areas separately — so the gallery stays open for guests while the operating interface sits behind it.
The network PIN is separate from the admin PIN. Handing it to the attendant does not hand over the admin access: behind the network PIN the admin area still asks for its own.
Four to twelve digits. As long as none is stored the boxes have no effect — a barrier without a key would be a lock nobody can open again.
A device calling up a protected area gets an input mask in the language set on the photo booth and is then unlocked for twelve hours. After a restart of the photo booth it asks again; likewise as soon as the PIN is changed or removed.
After five wrong entries in a row the prompt pauses for a minute, and twice as long on every further attempt. Counting happens per device.
Releasing the operating interface makes sense when a second screen is to operate the booth — a tablet at the attendant's place, for instance. Releasing the admin area pays off when things are adjusted from a laptop during the event, without standing in front of the booth.
After five wrong PIN entries in a row the login pauses for a minute, and twice as long on every further attempt. Counting happens per device; the correct PIN resets the counter.
Calling up something blocked from another device brings up a page in the language set on the photo booth. It names the area concerned and points out that the administering person can release it — not an error message that looks like a defect.
None of this changes anything on the photo booth screen itself, and remote access through the portal still leads into the admin area.
Shows licence type, remaining term, issue date and the time of the last synchronisation. This is where a key is activated and, before a device change, released again.
The licence has to sync with the licence server at least once every 180 days; with an internet connection this happens automatically. "Next sync due by" shows the date. From 30 days before, the start screen points this out at every program start; after that, no new sessions can be started until the next sync. This does not apply to the trial version.
A backup covers the whole device's setup — all events with their layouts, graphics and settings, plus the accounts and the counters. It is the fallback for a device change or a failure.
Captures stay out of it: session folders and gallery do not go into the file. A backup is therefore small and written within seconds. For the images there are "Export event captures", the event package and the session folder.
Restoring keeps existing captures, including those of events missing from the backup — their images then appear under "Captures of deleted events".
Backup and restore run in the background and show a progress bar; the admin area stays usable meanwhile.
To hand a single event to a customer or a second booth, the event package is the right way, see Managing events — it contains no credentials.
Restart and quit the software, restart and shut down the machine, plus:
Check configuration — looks for missing or invalid fields and repairs them. Helps when something stops working after an update.
Clear UI cache — clears the browser cache of the kiosk mode so changes become visible immediately.
Edge swipe gestures — switch them off so that a swipe from the screen edge does not open Windows.
Debug console — for troubleshooting; the application should run in windowed mode for it.
Photo mirror
A photo mirror is an upright screen, usually behind a mirror front, with a camera rotated by 90° above it. Guests see themselves life-size and operate everything directly on the screen. The same software runs a photo booth and a photo mirror; the difference is a single setting, the build type.
The build type is chosen in the setup assistant on first launch (second step, see First start) and can be changed at any time under admin area "System Settings" > "Build type".
The build type belongs to the device, not to the event. An event created on a photo booth runs on the mirror without any changes and arranges itself there for the upright screen.
When switching, a confirmation lists what changes on the camera: a rotation by 90° and a mirrored live view, for the photo camera and the boomerang camera alike. Without confirmation everything stays as it was. A camera that is already set upright keeps its direction.
"Check live view" in the same section shows whether the direction is right. If the image is upside down, the camera is mounted the other way round - "Rotate the other way" then switches both camera sections to the opposite direction. Rotation and mirroring are afterwards found in the "Camera" section as usual.
On a mirror, the bottom edge of the screen is at knee height. The interface therefore arranges itself differently - without extra switches in the individual sections:
The buttons of every screen sit directly below the heading instead of at the bottom edge. This applies to notices, mode, layout and filter selection, capture, shot preview and the end screen.
The live view and the finished image sit at the top, as close to the camera as possible. The closer the reflection is to the camera, the less guests look past it in the photo.
The countdown is always at the top centre, right below the camera. The position from the event stays saved and applies again on a photo booth.
Dialogs such as the gallery's large view, sharing or the number of prints are at the top.
If the event sets "Position start/gallery buttons" to "Bottom", they are still at the top on the mirror.
A custom arrangement from the start screen editor or the end screen editor is not affected: whoever placed elements freely there decides their position.
Layout editor
A layout determines what the finished picture looks like: how many captures are on it, where they sit, what surrounds them. Layouts belong to the event.
The editor opens through "Layout editor" in the menu or through the icon at the top of the admin area.
The area of the finished picture. Common sizes are provided, custom ones can be created and named
Placeholders
The image slots the captures go into. Their number decides how many captures a session takes
Elements
Graphics, texts, shapes and backgrounds
Layers
The list of all elements, with order, show/hide, lock and edit
Effects
Corner radius, shadow, inner shadow/glow, border and glow — for elements and for photo slots
Preview
Shows the layout filled with the preview photo; "Save as JPEG" saves it as a file, asking for folder and name
The header bar sits at the top. On the left are "Back", the on-screen keyboard and the layout menu, which shows the name and size of the open layout. It switches between layouts, each shown with a small preview, and holds "New", "Duplicate", "Export layout", "Import layout" and "Delete". In the middle follow "Canvas", "Insert" and "Photo slots", on the right undo, redo, the shortcuts (?), "Preview", "Test print", "Reset" and "Save". Layers and properties sit to the right of the canvas.
The menu on the right can be collapsed with the arrow button at its edge. This pays off on tablets and small screens once fine alignment starts and the canvas would otherwise appear small. The next time the editor opens, it is expanded again.
On narrow screens the areas are stacked and the editor fills exactly the screen height: the header bar at the top, wrapping onto several lines if needed, the canvas below it and the menu at the bottom. The menu collapses downwards, and the canvas grows into the freed space.
"Canvas" in the header bar opens size and background of the layout. The size counts in pixels of the finished picture; for a 300 dpi print on 10 × 15 cm that is 1800 × 1200. The ⇄ button between width and height swaps portrait and landscape. A size needed more often can be saved as a preset and is then available in all layouts.
In the layout menu of the header bar, click "New" and choose the format to match the paper format (6 × 4 or photo strip, for instance). The dialog shows the available formats as tiles with an aspect ratio preview; custom dimensions can be entered below them. Name and description of the layout belong in the same step.
Insert and arrange the placeholders with "Insert" > "Photo slot". "Photo slots" > "Arrangement" places common layouts of one to six photo slots in one step.
Add graphics and texts with "Insert" — logo, date, names, frames.
Use the layers to set the order: whatever should sit on top of the photo goes to the top.
Save, then check in the preview.
In "Capture modes & layout assignment", enable the layout for the mode you want.
Several elements can be selected together with the Ctrl key held and then aligned. With three or more elements, the two buttons below the alignment distribute them evenly – for example a row of photo slots or logos.
The selected element shows eight handles for its size and a dot above it for rotating — for photo slots just as for text, graphics, shapes and QR codes. The four round handles in the corners change width and height together, the four square ones at the edge centres change only one side: the side ones the width, the top and bottom ones the height. On a photo slot with a fixed aspect ratio that ratio applies at the corners only; an edge handle leaves it deliberately. On a text the font grows along at the corners only — the side handles set the width at which the text wraps. Small elements keep just the four corners, otherwise the handles would lie on top of each other. Unselected elements stay without handles so they do not catch each other's clicks.
At the corners, images, graphics, shapes and QR codes keep their aspect ratio; dragging there with Shift held changes it freely. The handles at the edge centres still change one side only.
While a single element is being moved, it snaps to the edges and centres of the other elements and to the edge and centre of the canvas; a thin line shows what it snapped to. The "Snap to other elements" checkbox below the alignment buttons turns this off, and holding Alt suspends it for a single drag.
The arrow keys move the selected element by one pixel, with Shift by ten. Ctrl+C and Ctrl+V copy elements, also into another layout; Ctrl+D or the "Duplicate" button in the element section places a copy slightly offset next to it. The "?" button in the header bar, or the ? key, lists all shortcuts and handles.
For fine work the view can be enlarged: Ctrl+mouse wheel zooms around the pointer, Ctrl+plus and Ctrl+minus in steps, as do the buttons at the bottom right of the canvas. The percentage there gives the size relative to the finished picture; clicking it or pressing Ctrl+0 fits the canvas again. When zoomed in, the mouse wheel scrolls the view, and holding Space or the middle mouse button pans it.
A selection frame picks several elements at once: drag on empty space, and every element the frame touches is selected. With Ctrl held they are added to the current selection. A click on empty space clears the selection.
In the layer list, the grip ⠿ on the left of each row moves a layer forward or back by dragging – with the mouse as well as with a finger. A line shows where it will land.
The lock in the layer list protects an element from being moved by accident – useful for a background image or a frame graphic that gets in the way while working on texts and photo slots. On the canvas a locked element can neither be grabbed nor rotated, and a click on it reaches the element below. Alignment, arrow keys and the selection frame leave it in place. It stays selectable through the layer list, and its settings can still be changed. The open lock only appears on the row under the pointer and on the selected one.
A grid can also be shown and, separately, switched on as a second snapping aid; spacing and colour are free to choose. The spacing counts in canvas pixels, not screen pixels. If an element snaps to another element at the same time, that wins — reaching for it is almost always what was meant.
A background or a frame is an element like any other: insert it with Insert > Image and move it to the right position in the layer list. Below the photo slots it becomes a background, above them a frame. A layout may hold several images, for example a background and a frame together.
An image at least as large as the canvas fills it completely when inserted. If it is larger, the editor offers to set the canvas to the image size. Smaller images sit in the middle at their original size.
Photo slots > Detect from frame graphic reads the transparent cutouts of the selected image layer and creates photo slots there. This pays off with ready-made frame graphics that have photo openings. If the frame graphic gets in the way afterwards, the lock in the layer list helps.
Corner radius, drop shadow, inner shadow/glow, border and glow are available for elements and for photo slots. On a photo slot the effect sits on the fitted picture. The dialog opens like the one for an element: double-click the slot, double-click it in the layer list, or use the pencil there. For a text, the effects are in the "Text" section of the sidebar on the right.
The "Apply effects to all photo slots" checkbox in the photo slot dialog gives every photo slot the same effects – handy for photo strips and collages where every picture should be framed alike. Name and capture position stay per slot, and a single "Undo" reverts it for all.
The opacity in the same dialog applies to the whole element including shadow, border and glow – for example for a subtle logo used as a watermark. The shadow also has its own opacity; it makes the shadow softer without lightening the element itself.
The dial sets the direction of the drop shadow: the line points where the shadow falls. Drag to turn it, the arrow keys turn by one degree, with shift by fifteen. Angle and distance stand next to it as numbers.
The corner radius rounds photos, images, QR codes, rectangles and texts with a background; shadow, border and glow follow the rounding. Without a corner radius the canvas shows everything square, just as it appears in the finished picture.
Instead of a colour, a border can carry a gradient ("Fill"): gold, silver, rose gold and bronze are provided as presets, plus a custom gradient of two colours. A dial of its own sets the direction. Metallic gradients look elegant on light and dark backgrounds alike and suit weddings and anniversaries. Shapes offer the same gradients under "Fill" in the shape dialog.
The inner shadow falls from the edge into the element. With a dark colour and some distance a photo or a text looks embossed; with a light colour and distance 0 the edge glows inwards.
A QR element knows three targets: the web album, a custom address and the single image. The single-image code leads to exactly this one shot and always appears on the printout only — on screen the guest is offered the code anyway, on paper it is the only way.
Text is written directly on the canvas. Insert > Text places a new text in the centre; the placeholder is selected and is replaced as soon as typing starts. Double-clicking an existing text – on the canvas or in the layer list – opens it for editing.
While editing, a bar above the text offers font, font size, colour, bold and italic, alignment and "Insert field" for dynamic values. Every change shows on the canvas at once, and the cursor and selection in the text stay where they are. "More settings" jumps to the "Text" section of the sidebar on the right. It holds every setting of the selected text, plus visibility and effects; each change takes effect at once.
Enter starts a new line.
The green tick, a click next to the text or Ctrl+Enter apply the text.
The cross or Escape discard the changes. A text that was only just inserted disappears again.
An empty text is removed when applied; "Undo" brings it back.
For rotated text the bar stays horizontal above it, so it remains easy to hit.
The grip ⠿ on the left lets you drag the bar somewhere else, for instance when it covers something. It stays there for the next texts too; double-clicking the grip puts it back at the text.
Letter and line spacing are in the "Text" section of the sidebar. Letter spacing counts in thousandths of the font size, like tracking in graphics programs: 0 is the font's own spacing, 100 adds a tenth of the font size between two characters, negative values move them closer. Widely spaced capitals often look more elegant in headings. Line spacing counts in percent; 100 % is the spacing texts had so far, so older layouts stay unchanged.
A text can get a coloured background ("Background" in the "Text" section). Its frame then keeps the size it was drawn at instead of shrinking to the letters – handy for a banner or a name tag.
An outline ("Outline (px)" and "Outline colour") puts an edge around the letters. It keeps light text readable on light photos too, such as white lettering with a dark outline over a photo slot. Under "Fill" the lettering can carry a gradient instead of a colour, with the same presets as the border – gold for "Mr & Mrs", silver for an anniversary.
A text can take its content from the event instead of being typed in. One single layout then serves many occasions: a duplicated event carries its own name and its own date without anyone touching the layout.
The "Text" section of the sidebar offers buttons below the text field, one per available entry; while editing on the canvas, "Insert field" lists them. A click inserts the matching token at the cursor. Fixed text and tokens can be mixed, for example "Wedding of {eventname}" or "{eventname} on {datumstart}".
Token
Content
{eventname}
The name of the event
{notiz}
The first line of the note
{notizvoll}
The complete note
{eventdatum}
The date of the event; without a period, its first day
{datumstart}, {datumende}
First and last day of the period
{uhrzeitstart}, {uhrzeitende}
Start and end time
{zeitraum}
Both days together, or just one if it is a single day
{jahr}
The year of the start
{aufnahmedatum}
The day the picture is taken
{aufnahmezeit}
Hour and minute the picture is taken
{kennung}
The identifier of the event
{zugangscode}
The access code of the event
The values are inserted when the picture is created — in the saved photo, on the printout, in the preview tile and in the live preview of the capture screen. The layout itself always keeps the token. A change to the event name therefore takes effect with the next capture; layouts never need to be updated.
On the canvas such an element shows the value of the loaded event and has a dashed outline. A mistyped token is reported in the "Text" section before it ends up on a printout.
If an entry is empty — the note of an event without a note, for instance — the text is left out. If the field ends up empty altogether, the element is not drawn. A literal curly brace is written twice: {{ and }}.
Texts use installed fonts. If one is missing, the editor says so explicitly — otherwise the printed picture would look different from the preview.
Text can also be set in bold and italic. If a font has no style of its own for this, it is imitated; with a real style the lettering usually looks calmer.
The font list shows a sample line in each font next to its name. A font you only recognise by its look can be found by scrolling; a search box above the list narrows the names.
Fonts belong to the event and travel with a preset or an event package.
Export layout in the layout menu of the header bar writes a ZIP file with the layout and its graphics.
Import layout reads it back in — on another booth as well.
Templates in dslrBooth and LumaBooth format can also be imported directly, as sold by template vendors.
Color values from dslrBooth or LumaBooth can be entered in the text field next to each color field. Both programs write colors with eight digits, such as "#FFE9E8E4" – the first two digits are the opacity. The field understands this notation; when typing only six digits, take the last six.
Borders and shadows of photo slots are carried over on import, as are borders around graphics. A template imported earlier only shows them after importing it again.
QR codes and the "Date" and "Date and time" items are carried over as well, the latter as dynamic texts. Survey answers, signature, session number and file name do not exist here; after the import the editor lists what is missing.
Shapes – rectangle, ellipse, line and star – are carried over with fill, outline and shadow.
Designing the start screen
The settings under "Adjust the start screen" arrange the start screen along a fixed pattern: logo at the top, title and subtitle below, then the buttons. For most events that is enough.
To place individual elements freely, open the editor — the button "Arrange the start screen freely" sits at the very top of "Adjust the start screen".
Six directions. With several elements selected they align to each other, with a single one to the whole stage
Distribute
Equal gaps between three or more elements. What is meant is the gap between them, not between their centres — with elements of different width only that looks even
To the centre of the stage
Puts the element exactly in the middle
Grid
A grid with adjustable spacing and colour. Both are purely a working aid and never appear on the start screen
While dragging, an element snaps to the edges and centres of the others; a guide shows which one. The Alt key suspends snapping when a place lies exactly between two snap points.
Every element has an anchor point: the point of the element that is placed on the stored position.
That sounds like a detail, but it decides whether an arrangement holds in every language. A title with the anchor "top centre" stays centred even when the Polish text turns out considerably wider. With the anchor "top left" the left edge would stay put and the text would push out of the centre to the right.
Title and subtitle can have their own text colour. Without the tick "Own", the general text colour from Appearance applies — and a later change there then still reaches the element.
Over a background image, legibility usually matters more than the colour. White stays hard to read on a bright sky, however white it is; a shadow or outline solves that regardless of what happens to lie behind it.
Setting
What for
Soft shadow
Calm backgrounds, discreet
Strong shadow
Busy photos
Dark outline
When light and dark lie directly next to each other behind the text
An own text first appears the same in every language. That is usually right: names, dates and hashtags are not translated.
If the text is a sentence that should be translated, a version can be added under "Versions per language". An empty field means "take the base text" — so it only needs filling where something different really belongs.
Not every element is always visible: the gallery button only appears with the gallery switched on, the language selection only with more than one guest language, the buzzer hint only with a buzzer set up.
The area "Not visible right now" lists these elements, names the reason and leads with one click to the setting that switches them on.
It travels along with copies and exports, like branding and layouts. A different event has its own arrangement — or none, and therefore the familiar one.
Designing the final screen
The final screen is what guests look at longest: the finished picture, with the buttons for printing, sharing and finishing below it. To arrange them differently, open the editor — the button "Open screen editor" sits in "Finish and sharing" > "Customize final screen".
It is operated exactly like the start screen editor: drag, resize at the corners, rotate at the round handle, align and distribute. This chapter only describes what is different on the final screen.
In the editor the finished picture does not get a fixed box but an area: the frame says how much room the picture may take up. The picture is fitted into it without being distorted — so a photo strip fills only the middle of a wide area, while a landscape picture reaches its sides.
Thin outlines are drawn inside the frame: landscape, portrait, square and photo strip, all four at once. They show at a glance whether a button beside it would lie on the picture in one of the formats. The format the preview currently shows filled in is drawn more strongly.
Width and height of the area can be changed freely at the corners — unlike with the other elements, no aspect ratio is kept. That is the point of the area: it belongs to none of the formats.
The two fields sound similar and mean different things:
Field
Effect
Anchor point
Which point of the area is placed on the coordinate
Alignment within the area
Where the picture sits inside the area when it does not fill it
By default the picture sits in the centre of the area. To put the photo strip deliberately at the left edge of the area, use the alignment — not the anchor point.
The finished picture is not always the same shape: a photo strip is narrow and tall, a single photo usually landscape. A button that sits neatly beside the picture in landscape may lie on top of it with a photo strip.
The sidebar therefore offers four formats: landscape, portrait, square and photo strip. One click shows the arrangement with that format — the picture in the preview is a placeholder, only its shape matters.
Text, image and area can be added just as on the start screen — a sponsor logo, for instance, or a note about the photo album link. They carry their own switch and appear independently of any setting.
It travels with copies and exports, like that of the start screen. Another event has its own arrangement — or none at all, and thus the familiar one.
Web photo album
The web photo album is the gallery on the internet: guests scan the QR code on the start screen and browse the pictures of the party on their own phone.
Which upload target is set under "Cloud & mail" decides what the guest sees after scanning. Pictures arrive in all three cases.
Upload target
What guests see
Access
RAWCaptureBooth self-hosted server
An album page of its own with all pictures of the party
The event's access code, contained in the link
Dropbox
The shared event folder in the Dropbox view, with previews and downloads
Anyone with the link gets in; no account needed
Google Drive
The shared event folder in the Drive view
Anyone with the link gets in; no account needed
Nextcloud
The shared event folder in the Nextcloud view, with previews and downloads
Anyone with the link gets in; no account needed
pCloud
The shared event folder in the pCloud view, with previews and downloads
Anyone with the link gets in; no account needed
The software creates the sharing link itself: when first needed, the event's folder is shared and the QR code is pointed at exactly that folder — not at the parent folder, which would expose every event.
The QR code on the start screen is configured under "QR codes", see QR codes. Normally the address is derived automatically from the active upload target; with your own domain it can be assembled manually from base URL and parameter.
View and download pictures — in the provider's view on Dropbox and Google Drive, on the album page with the self-hosted server. Anything beyond that, such as a host's login for managing the album, depends on the version of the self-hosted server and is described in its documentation.
Cloud upload is off, or all jobs are still sitting in the outbox
QR code leads nowhere
Access code or identifier changed after the codes were handed out, or the upload target was switched
Album shows other people's pictures
Two events share the same access code or identifier — every event needs its own
Only older pictures visible
No network during the party; the stragglers arrive once the outbox is worked off
No link on Dropbox
The Dropbox account is unconfirmed — without confirmation Dropbox refuses to create sharing links
Language editor
The language editor changes the texts of the interface without needing a new program version. It is meant for two cases: a wording should sound different, or a translation is missing or does not fit.
The technical identifier of the text — it stays unchanged
Reference
The text in the reference language, as a template
Translation
The text in the language being edited
At the top are the language selection, a filter across key and text, and the switch "Show missing only". A status line names the total number of entries and how many are without a translation.
"Copy reference" takes the text from the reference column — useful as a starting point. "Reset" restores the shipped text.
Pictures secured — for example by exporting the event including its pictures
If a web photo album is running: give the customer the link and the access code
Unplug camera and printer, pack the booth
Archive the event once the customer has everything
Quick guide for the host
This page is meant to be printed and addresses the host, that is the customer who has the booth for the evening. Replace the entries in square brackets before printing.
The pictures are [also stored online / not stored online]. The online gallery is available until [date].
[Number] prints are included. After that [it stops / it continues at extra cost].
Set up by [name]; teardown is planned from [time].
Questions during the evening: [phone number]
Quick settings for the host
The quick settings menu is not meant for the operator but for the host — the customer who has the booth for an evening. It gives them a PIN-protected area in which they can react to a failed printer, dead Wi-Fi or a queue that is too long, without the operator having to drive over.
It is configured in the admin area under "Quick Settings Menu"; it belongs to the event, so it can differ per party. Often nothing at all at a company party, and a fair bit at a wedding with a designated contact.
Set a PIN (4 to 12 digits). The host opens the menu with it. "Remove PIN" releases the menu without one.
Choose the access: through the visible arrow button, through an invisible corner at the bottom right of the screen, or both. A hold duration can be added — the area then has to be held for a few seconds so a guest does not hit it by accident.
Tick the permissions: every single switch is released or blocked. Anything not ticked does not appear in the menu at all.
Optionally the menu can also be opened with the admin PIN.
Instead of the arrow symbol the button can carry a custom image: choose a file under "Access & Opening", cut-out PNG files work best. "Remove" brings the arrow symbol back. The image belongs to the event and travels with copies and exports.
Access and hold time sit above; below them every switch is released individually.
Capture modes, filters, "decorate picture", digital background, countdown sounds, buzzer or key control
Output
Printing, automatic printing, mail sending
Sharing & online
Cloud upload, web album QR, single-image QR, online/offline mode
Exposure
Live view exposure, capture exposure
System
Restart or quit the software, restart or shut down the machine
The two exposure entries behave differently from the rest. The live view exposure is applied with "Save" like any other switch. The capture exposure is not stored: the values are read from the camera when the menu opens, and every step goes straight back to it. If the camera is not set to M, or regulates the ISO itself, the note is right there — otherwise someone turns the dial and nothing arrives.
The counters for sessions, prints and AI portraits appear at the top of the menu. Under "Show counters", each one can be hidden individually, for example if the organiser should not see the number of prints. The AI portrait counter only appears anyway when the feature is active in the event or portraits have already been created. With all three off, the counter area is omitted entirely.
"Data Processing" > "Privacy by default" deletes the session data immediately after every session. When switching it on, the software asks whether e-mail, cloud upload, gallery, QR codes and the live folder export should be switched off as well.
The setting suits occasions where nothing should remain: company parties with strict rules, events in public authorities, trade fair appearances with data protection requirements.
"Data Processing" > "Export event pictures" writes the pictures of the loaded event into a target folder. You choose what comes along:
Pictures with layout
Unprocessed individual captures
Processed individual captures
Animations (GIF and boomerang)
The target folder receives one subfolder per category, named as in the event's live folder export, by default "Layout-Bilder", "Roh-Bilder", "Bearbeitete Bilder" and "Animationen". Pictures of other events are untouched. The live folder export does not need to be switched on for this – only the names set there count.
To pass on or back up a whole event including its settings, the export as an event package is the better route, see Managing events.
"Data Processing" > "Delete event pictures" permanently removes all sessions, outputs and individual captures of the loaded event. Other events are untouched.
Alternatively, when deleting a whole event you can decide whether the pictures go with it.
Camera off, asleep or claimed by another program. Switch on, close other programs, "Refresh detection"
Live view black
Lens cap; or flash settings without live view brightening; or live view disabled on the camera; or the graphics driver does not cope with the graphics acceleration ("Display & scaling")
Shutter fires, no picture
Autofocus finds nothing. Switch the lens to manual focus
Camera falls asleep
Disable the camera's auto power-off, check the Windows power options
Capture aborts
Raise the values under "Camera" > "Time limits"
Dead after a cable change
Switch the camera off and on, then "Refresh detection"
At the top are the known bugs that will be fixed with one of the next updates. Below them are the planned features and improvements. Every entry carries a badge showing its state — from "Reported" through "In progress" to "Fixed".
Only entries that affect the installed version are shown. A bug that only occurs in a newer version stays hidden, and so does one that was fixed long before the installed version. Both can be shown with the switch above the list.
The list is fetched from the website and stored after every successful request. If the photo booth has no network — the normal case on the event day — the most recently loaded state appears together with the date it was fetched. Only if the photo booth has never managed to load a list does the area stay empty.
At the bottom it always says when the list was last maintained and when it was last loaded. A button next to it fetches it again.
Bugs, suggestions for improvements and wishes for new features go to hello@rawcapturebooth.app by e-mail. The area offers three ways to get there, because a photo booth computer rarely has a mail program set up:
the address as text to copy by hand
a button that puts it on the clipboard
a QR code that opens the mail on a phone — the installed version is already in the text
Helpful in a report are the installed version, the camera model and a description of what led to the behaviour. For bugs that can be repeated, the sequence of steps is the most valuable part.
Reports do not appear in the lists by themselves: they are read, checked and only then taken up.
News
Found in the admin area as the second entry of the sidebar, directly below "Favorites".
The area shows the ten latest posts about RAWCaptureBooth: what an update brings, experience with cameras and printers, tips for the event day. Reading happens entirely in the admin area — no browser opens, and no post leads out of the software.
If a post has been added since the last visit, a dot in the accent colour pulses on the menu entry. It disappears as soon as the area has been opened and only returns with the next new post. The new posts themselves carry the "New" badge until the next reload.
After installation and after an update, all posts published up to then count as read. The dot therefore only appears when there really is something new.
Posts are stored on the photo booth after every successful fetch. Without a network, the last loaded state is shown together with its date. Images in a post need a connection; without one, the text stays fully readable.
Some posts end with a question and several answers. A click on an answer is the vote — there is no second confirmation. The chosen answer is then marked, and the poll cannot be answered again.
Taking part is voluntary and anonymous. Only the chosen answer and the installed version are sent, no device, customer or licence data. So that a photo booth does not vote twice, it gives itself a random ID that reveals nothing about it.
Without internet, the vote does not arrive. The software reports this and records nothing — the poll stays open and can be answered later. A poll that has ended remains visible but no longer accepts votes.
I loaded a different event — are my pictures gone? No. Pictures live in their event's folder and reappear as soon as it is loaded.
Why does the booth look different after an event switch? Because layouts, graphics, colours and permissions belong to the event. Camera and printer stay as they are.
Can I change a running event afterwards? Yes. In the event assistant choose "Reconfigure loaded event" — counters and pictures stay untouched.
How do I get the same setup onto a second booth? Through an event package (with access code, for the same party) or through a preset (without access code, as a template).
Why was my scheduled event not loaded automatically? Because it only has a date, not a period. Only events with an explicitly set period are loaded automatically.
The camera is not detected. Switch the camera on, close programs that access it, then "Refresh detection". On Canon a restart is needed after enabling the driver.
Why is the live view almost black while the photo is exposed correctly? Because the camera is set up for flash. The remedy is "Brighten live view via the camera".
Why can't I change aperture and ISO? Because the camera chooses them itself in the current mode, in Av/A for example the shutter speed. The camera detection and the section "Capture exposure: settings" name the mode; greyed-out fields are chosen by the camera. In full auto and the scene modes none of them can be set.
How do I get photo strips and 6 × 4 at the same time? Install the same printer twice in Windows — once without the cut as the main printer, once with the 2″ cut as the photo strip printer.
The print is not centred. First check the paper size in the printer driver, then set the per-printer correction. Only after that the offsets with the event.
The QR code leads nowhere. Usually the event's access code or identifier was changed after the codes were handed out, or the upload target was switched. On Dropbox an unconfirmed account can be the cause as well — without confirmation Dropbox refuses to create sharing links.
Do guests get all the pictures with Dropbox or Google Drive too? Yes. There the QR code leads to the shared folder of the party, with previews and downloads. The difference to the self-hosted server is the interface: it offers an album page of its own with an access code instead of the cloud provider's view.
Nothing is being uploaded. Usually the network is simply missing. The jobs sit in the outbox and go out automatically later.
How do I make sure nothing is left on the booth? Enable privacy by default and switch off the live folder export along with it — otherwise it leaves permanent copies in the target folder.
Can guests see other people's pictures? At the booth, yes, as soon as the gallery is active. Where that is unwanted: switch the gallery off and offer only the single-image QR.
The screen goes dark during the party. Windows power options. The item "Prepare Windows for photobooth operation" in the setup list takes care of it.
Swiping from the screen edge opens Windows. Switch off edge swipe gestures, same item.
The booth shows the slideshow instead of returning to the start screen. Then the screensaver is set faster than the return to the start screen. Tune both times to each other.
May I update on the day of the event? Better not. An update may rearrange settings or require a restart.
What happens during a power cut? The booth restarts and loads the event whose period is currently running. Without a period, the last loaded event continues.
Can I move the licence to another machine? Yes — release it under "License management" first. If the machine has failed, the seat can be released through the licence management on the server.
Does the booth run without internet? Yes. Capture, layout, printing and the gallery need no network. Only sending, uploading and the licence check catch up later. The licence does have to sync with the licence server at least once every 180 days, otherwise no new sessions can be started afterwards; the start screen announces this 30 days ahead.
Glossary
Term
Meaning
Event
A party with its own settings, layouts, graphics and pictures. Exactly one is loaded at a time
Event package
A file holding a whole event — settings, layouts, access code, optionally the pictures. For backup and moving
Preset
Template of settings, layouts, fonts and graphics, without pictures and without an access code
Identifier
The cloud folder name derived from the event name
Access code
What opens the web photo album; it is inside QR codes and links
Session
One run: from the start through the captures to the finished picture
Layout
The design of the finished picture: image slots, frames, texts, graphics
Placeholder
An image slot in the layout. Their number decides how many captures a session takes
Capture mode
Photo, GIF or boomerang
Boomerang
A short animation that plays forwards and backwards
Filter
A look that can be chosen after the capture, such as black and white
Decorate picture
Guests drawing on and adding stickers to the finished picture
Digital background
Replacing the background by green screen or AI
Chroma key
Cutting out based on the colour of a green screen cloth
Live view
The running camera image on the screen
Countdown
The count before the shutter fires
Buzzer
Trigger button; wired as a keyboard input or wireless over Bluetooth
Gallery
The picture overview at the booth itself
Web photo album
The online gallery of the party, reachable by QR code
Single-image QR
A QR code for exactly one picture instead of the whole gallery
Outbox
Queue for uploads and mails that could not be sent yet
Live folder export
Continuous copying of finished pictures into a folder, e.g. a USB stick
Privacy by default
Session data is deleted immediately after the session
Quick settings
PIN-protected menu for the host during the party
Operating hours
The window in which the booth can be used at all
Period
The time span of an event; decides when it is loaded automatically
Usage limit
Maximum number of sessions or prints per event
Pay-per-use
Payment by the guest before the session or before printing
Printer pool
Several printers sharing the jobs
Photo strip
Narrow print format, produced by the printer's 2″ cut
Kiosk mode
Full screen without Windows controls
Remote management
State reporting to a web server, including commands from there
Remote access
Opening the photobooth interface remotely in a browser
Self-hosted server
Your own web server for upload and web photo album
Setup list
The list in the admin area that guides through the initial setup
Customer form
HTML file customers use to enter their wishes; it is read back in