Your first event
Camera and printer are ready and the licence is active. What is missing is the party. This chapter creates a complete event, using the running example "Smith wedding".
What an event is#
An event is a party with everything that defines it: its own layouts, its own graphics, its own start screen, its own print and sharing rules and its own pictures. Exactly one event is loaded at a time. Camera, printer, accounts and licence are untouched by it — they belong to the booth.
The full picture is in How events work.
Creating the event#
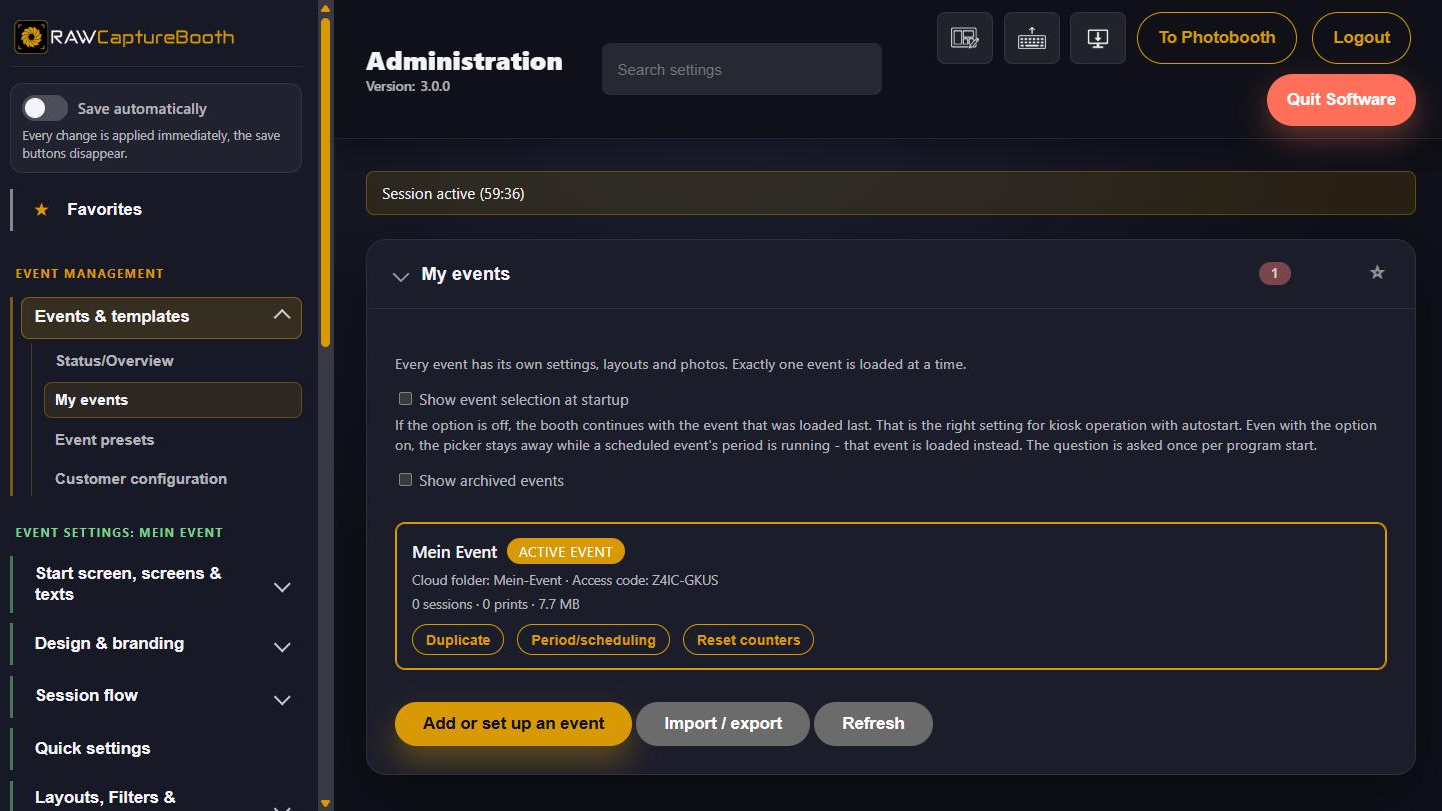
- Open the admin area, go to "Event management" > "My events".
- Press "Add or reconfigure event". The event assistant opens.
The assistant walks through up to 14 steps. For a first event it is enough to leave the defaults alone and set the three or four entries that really matter.
Step 1: New or existing#
Choose "Create new event". Below it, pick where the content comes from:
| Basis | Used for |
|---|---|
| From preset | A ready-made template with layouts, fonts and graphics — as soon as one has been stored |
| Copy of an event | Takes everything from an already configured party |
| Start empty | Only if everything is to be built by hand |
| From customer form | Takes the customer's wishes from a form file (see Customer configuration) |
For the very first event: Start empty. Presets exist only once a set-up event has been stored as a template; the supplied layouts are there from the setup onwards.
Step 2: Event basics#
Name, date and note. The name matters most — the cloud folder and the link to the web photo album are derived from it. The assistant shows both while you type, and only where they are actually used.
For the example: name "Smith wedding", the date of the party, note along the lines of "contact: best man John, teardown from 2 am".
Step 3: Scheduling#
Decides whether the booth loads this event by itself when the time comes. Start and end with times, across midnight as well — a party from 3 pm to 2 am is recognised right to the end. For a new event the period is switched off — the checkbox turns it on, and the fields then hold a start of now and an end a week later.
This is the setting that makes a restart in the middle of the party harmless: the booth comes back up and loads exactly the party that is running.
The remaining steps#
| Step | What it covers |
|---|---|
| Privacy | Privacy by default. When active, gallery, web photo album, single-image QR and mail are dropped |
| Quick settings | What the host may switch during the party, plus the PIN for it |
| Capture modes | Photo is always active; GIF and boomerang can be added |
| Layouts | Which layouts are available per capture mode |
| Gallery & online sharing | Gallery at the booth, web album QR, upload behaviour, single-image QR |
| Whether guests can receive their pictures by mail | |
| Live folder export | Extra copies of finished pictures during the party, for example on a USB stick |
| Allow printing, automatic print, number of copies, printing from the gallery | |
| Countdown, filters & styling | Countdown, filter choice, "decorate picture", digital background |
| Usage limits & operating hours | Limits on sessions and prints, and the window in which the booth can be used |
| Summary | Check everything and apply |
While saving, the assistant shows which area it is working on. If an area could not be saved, the report is highlighted and the view jumps to it.
The first picture#
- Go back to the guest view with "To Photobooth".
- The start screen shows the name of the party and the start button.
- Trigger a capture, wait for the countdown, check the result.
- If printing is enabled: print one copy and check colour, margins and cropping on the actual paper.
Switching between events#
"My events" lists every event with name, period, note, counters and disk usage; the loaded one is highlighted. "Load" switches to it. Layouts, graphics, access code and limits are exchanged — camera and printer stay as they are.